

You do not need an expensive dedicated smoker to produce authentic, low-and-slow BBQ at home. A standard charcoal grill – including a basic Weber Kettle – can smoke ribs, brisket, pork shoulder, and chicken with excellent results when set up correctly. The technique relies on 2-zone cooking, careful temperature control through vent management, and the right combination of charcoal and smoking wood. This guide walks through the complete process from equipment setup to food safety, so you can start smoking on your charcoal grill with confidence.
- 2-Zone Setup: Master indirect heat by arranging coals on one side and cooking meat on the other, maintaining a consistent 225-275°F for tender, smoke-infused results.
- Essential Gear: Equip yourself with a lidded grill, quality briquettes, wood chunks or chips, a water pan for humidity, and a dual-probe thermometer for precise temperature monitoring.
- Temperature Control: Regulate grill temperature primarily with the bottom intake vent, keeping the top exhaust vent partially open to ensure clean, thin blue smoke and prevent creosote buildup.
- Safe Smoking: Ensure meat reaches 140°F within 4 hours to avoid the USDA danger zone, always starting with fully thawed meat for optimal safety and results.
What are the basics of charcoal smoking for beginners?
Charcoal smoking uses indirect heat at 225–275°F to cook meat slowly over 2–12 hours, depending on the cut. A standard charcoal grill can handle the job when it provides three controls:
- A tight-fitting lid: Holds heat and guides smoke around the food.
- Adjustable intake and exhaust vents: Regulate oxygen, temperature, and smoke flow.
- Two distinct zones: Lit charcoal supplies heat on one side while the meat cooks on the opposite, cooler side.
That arrangement is what separates smoking from direct grilling. Direct grilling puts food over 400–500°F coals for a fast cook; smoking keeps food away from the coals and surrounds it with lower indirect heat and wood smoke. A Weber Kettle is a popular beginner option because its round shape circulates smoke and its dampers make airflow adjustments straightforward, but any lidded grill with working vents can follow the same principles.
Essential Equipment for Your Smoking Set Up
Build the setup around five core items:
- Lidded charcoal grill: Look for both a bottom intake vent and a top exhaust vent. Kettle, barrel, and kamado-style grills can all work.
- Charcoal: Choose briquettes for predictable, steady heat or lump charcoal for a hotter, more variable fire with less ash.
- Smoking wood: Use chunks for longer cooks and chips in a vented foil pouch for shorter sessions.
- Water pan: Place a disposable aluminum pan of water between the coals and meat to absorb heat spikes, add humidity, and stabilize the chamber.
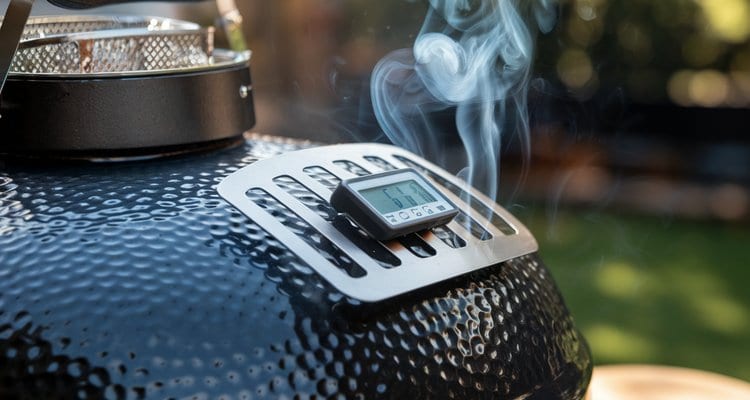
- Dual-probe thermometer: Use one probe at grate level and the other in the meat so you can track both cooking temperature and doneness.
Charcoal Grill Requirements
A tight-fitting lid and adjustable vents matter more than the grill’s shape. The bottom intake feeds the fire, while the top exhaust keeps air and clean smoke moving across the food.
Choosing Your Charcoal
Match the fuel to the amount of fire management you want:
- Briquettes: Their uniform size gives beginners consistent heat and a predictable, longer burn during low-and-slow cooks.
- Lump charcoal: Natural hardwood pieces light faster, burn hotter, create less ash, and contribute a wood-fired flavor. Because the pieces vary in size, they require more active vent management.
How to Light Charcoal Correctly Without Lighter Fluid
- Fill a chimney starter with charcoal.
- Place one or two natural fire starters or crumpled newspaper underneath and light them; do not use lighter fluid, which can leave chemical off-flavors on the coals.
- Wait 15–20 minutes, until the top layer has a fine coating of gray ash.
- Pour the lit charcoal into the grill’s designated hot zone.
Selecting Smoking Wood
Wood Species Selection and Woods to Avoid
- Mild: Apple and cherry complement poultry and pork with subtle sweetness and a reddish hue.
- Medium: Oak and pecan are versatile choices across many meats.
- Strong: Hickory and mesquite stand up to beef brisket and game.
- Never use: Pine, cedar, fir, spruce, yew, or other resinous softwoods. Their sap and terpenes create bitter, potentially harmful smoke.
The Wood Soaking Debate: Steam vs. Clean Smoke
Soaking wood does not make it burn longer; the grill first spends energy evaporating the water, creating steam that can lower the cooking temperature. For cleaner smoke, use dry chunks that smolder slowly or place dry chips in a foil pouch with small holes to restrict oxygen. Choose chunks for sessions longer than 3 hours and chips for shorter cooks.
The Importance of a Water Pan
A water pan acts as a buffer between the fire and food. It absorbs heat spikes, adds humidity, and helps the chamber hold a steadier temperature.
Why a Dual-Probe Thermometer is Crucial
The grate probe measures the temperature where the food actually sits, while the meat probe tracks internal temperature. Together, they support both fire control and food safety.
Charcoal Smoking Setup Checklist
- Clean grates: Start with a clean cooking surface so smoke and rendered fat do not pick up stale flavors.
- Two-zone fire: Keep the charcoal on one side and leave the cooking side indirect for steady low heat.
- Water pan: Place the pan under the food or between the fire and food to buffer temperature swings.
- Thermometer probes: Measure grate temperature where the food sits, not just the lid thermometer.
- Wood chunks: Add two or three chunks early in the cook so the meat gets clean smoke while the surface is still moist.
- Spice Guru BBQ rub set — different seasoning blends for every BBQ occasion
- Hotec silicone basting brushes — evenly brush sauces, butters, or glazes
- Grill Heat Aid heat-resistant BBQ gloves — protect hands near hot grates and pans
- AMMZO digital meat thermometer — taking the guesswork out of grilling
How do you master the 2-zone cooking method?
The 2-zone method divides the grill into a hot side with lit charcoal and a cool side where the meat cooks by indirect heat. Two popular charcoal arrangements – the Snake Method and the Minion Method – extend burn times to 4-8 hours without needing to add fuel.
Push all lit charcoal to one side of the grill. Leave the opposite side completely empty. Place the water pan on the empty side, directly on the charcoal grate. The meat sits on the cooking grate above the water pan, away from direct heat.

Position the lid with the exhaust vent directly over the meat. This draws smoke from the coal side across the food before exiting, maximizing smoke flavor contact.
| Setup Method | Best For | Typical Burn Time | Difficulty |
|---|---|---|---|
| Standard 2-Zone Fire | Chicken, ribs, sausage, shorter smokes | 2-4 hours | Beginner |
| Snake Method | Ribs, pork shoulder, long kettle cooks | 4-6 hours | Beginner-friendly |
| Minion Method | Pork butt, brisket flats, larger charcoal grills | 6-8 hours | Moderate |
| Offset Firebox | Traditional stick-burning flavor | 45-60 minutes per fuel addition | Hands-on |
Use the standard two-zone fire for shorter sessions, the Snake Method for a steady kettle burn, and the Minion Method when a larger fuel reserve is useful.
The Snake Method
Arrange unlit briquettes in a C-shaped row, two briquettes wide and two briquettes high, around the inside edge of the grill. Place wood chunks on top of the unlit briquettes at intervals. Light 8-10 briquettes in a chimney starter and place them at one end of the snake. The lit coals gradually ignite the next briquettes in line, providing 4-6 hours of consistent 225-250°F heat without opening the lid.
The Minion Method
Fill one side of the charcoal grate with unlit briquettes. Nestle wood chunks throughout the pile. Light 10-15 briquettes in a chimney and pour them on top of the unlit pile. The lit coals slowly ignite the briquettes beneath them. This method produces longer burn times (6-8 hours) and works well in larger grills or when smoking thick cuts like pork shoulder.
How do you control temperature and manage smoke?
Airflow controls both heat and smoke quality. Use the vents for different jobs:
- Bottom intake vent—temperature: Open it wider to feed the coals more oxygen and raise the heat. Close it in small increments to reduce the fire.
- Top exhaust vent—smoke flow: Keep it at least partially open throughout the cook. A fully closed exhaust smothers the fire and traps stale smoke that can deposit bitter creosote.
- Starting position: Aim for the exhaust vent to be 1/4 to 1/2 open during most 225–250°F smoking sessions, then fine-tune with the intake.
Using the Vents
Make one small intake adjustment at a time and allow the grill temperature to respond before moving it again. Keeping the exhaust open maintains the draft that pulls heat and smoke from the fire, across the food, and out of the cooker.
Reading the Smoke
Use the smoke’s appearance and smell as a combustion check:
- Thick white smoke: Common during the first 15–20 minutes as wood ignites, but it contains volatile compounds and creosote that can taste bitter in excess.
- Thin blue smoke: Barely visible, wispy, and clean-smelling. It signals more complete combustion and is the target before the meat goes on.

Is Smoke from Charcoal Dangerous?
Avoid breathing any smoke in large or prolonged amounts. Cook outdoors with good ventilation, maintain airflow, and aim for thin blue smoke. Those practices limit the incomplete combustion that produces excess carbon monoxide and deposits bitter creosote on food during a normal backyard cook.
Step-by-Step: Smoking Your First Cut of Meat
The smoking process follows four steps: prep the grill grates for non-stick performance, position the meat on the cool side of the 2-zone setup, monitor internal temperature for food safety, and maintain 225-275°F grate temperature throughout the cook by adjusting the bottom vent.
Step 1: Prep the Grill Grates
Clean the grates with a wire brush, then rub a cut raw potato across the hot metal surface. The natural starches create a non-stick layer that prevents delicate meats like fish or chicken skin from tearing when flipped or removed.
Step 2: Position the Meat
Place the meat on the cool side of the grill, directly above the water pan. Close the lid with the exhaust vent positioned over the meat to draw smoke across it before exiting.
Step 3: Monitor and Adjust Temperature
Check the grate temperature every 30-45 minutes. Adjust the bottom vent in small increments – 1/4 inch at a time – and wait 10-15 minutes before adjusting again. Charcoal responds slowly to vent changes.
Step 4: Follow the 4-Hour Rule
The meat must reach an internal temperature of 140°F within 4 hours to stay safely outside the USDA danger zone (40-140°F), where harmful bacteria multiply rapidly.[USDA] Always start with fully thawed meat to avoid lingering in the danger zone.[FSIS]
Smoking Temperature and Time Reference
Different cuts of meat require different smoking temperatures and cook times to reach their target internal temperatures. This reference table covers the most common beginner-friendly cuts with the grate temperature, estimated time per pound, and safe finished internal temperature for each.
| Cut | Grate Temp | Time per Pound | Target Internal Temp |
|---|---|---|---|
| Pork Shoulder / Butt | 225-250°F | 1.5-2 hours | 195-205°F |
| Baby Back Ribs | 225-250°F | 4-5 hours total | 190-203°F |
| Whole Chicken | 250-275°F | 45-60 min | 165°F |
| Beef Brisket | 225-250°F | 1-1.5 hours | 195-205°F |
| Salmon Fillet | 200-225°F | 1-2 hours total | 145°F |
Treat these times as planning estimates; use the target internal temperature and the cut’s tenderness as the final doneness checks.
Adapting for Other Charcoal Grill Types
The same indirect-heat principle works across grill styles, but coal placement and airflow change with the cooker:
- Small kettle: Put the water pan on the charcoal grate beneath the food grate to conserve space, and shield the meat’s fire-facing edge with foil if direct radiation threatens to scorch it.
- Barrel grill: Bank coals at one end, place the water pan in the center, and set the meat at the opposite end.
- Offset smoker: Keep the fire in the separate firebox so the main chamber remains entirely indirect.
- Kamado-style cooker: Apply the same two-zone logic while making smaller vent adjustments because the insulated body holds heat efficiently.
Smoking on a Charcoal Barrel Grill
Smoking on Medium and Smaller Kettle Grills
Space is the main limitation on an 18-inch kettle. Place the water pan directly on the charcoal grate beneath the food instead of beside the coals. A foil shield can protect the meat’s nearest edge while heat circulates through the compact chamber.
A barrel grill provides more distance between the coal grate and cooking grate. Bank the coals at one end, position the water pan in the middle, and cook at the far end. Because the longer body creates a wider temperature gradient, rotate the meat 180 degrees halfway through the cook.
Using an Offset Smoker Attachment
For a grill with an offset firebox:
- Build and manage the fire entirely in the firebox, leaving the main chamber indirect.
- Add small wood splits or handfuls of charcoal every 45–60 minutes to maintain 225–250°F.
- Keep a chimney of lit charcoal ready as backup fuel during a long cook.
An offset needs more attention than a kettle because fuel burns faster in the smaller firebox, but the separate chamber preserves the same hot-side-to-cool-side airflow pattern.
Frequently Asked Questions
How do you smoke on a normal charcoal grill?
How do you turn a charcoal grill into a smoker?
Do you wait for charcoal to stop smoking before cooking?
What is the 4-hour rule for smoking meat?
What does rubbing a potato on a grill do?
How to smoke on a charcoal grill with wood chips?
How long does charcoal last when smoking?
Can you smoke with just charcoal and no wood?
How long does it take to smoke meat on a charcoal grill?
The cooking time depends entirely on the cut of meat and its weight. Thin cuts like fish or chicken breasts can take 1 to 2 hours, while ribs typically require 4 to 6 hours. Large, tough cuts like pork shoulder or beef brisket cooked low-and-slow can take anywhere from 8 to 16 hours to become tender.
How do you get a medium-rare finish when smoking on a charcoal grill?
To get a perfect medium-rare finish (130-135°F) on steaks or roasts, use the reverse-sear method. Smoke the meat at 225°F until its internal temperature reaches about 115°F, then transfer it directly over hot coals for 1 to 2 minutes per side to develop a rich, caramelized crust.
Take Home Message
Smoking on a charcoal grill is an accessible and rewarding way to achieve authentic BBQ flavors without specialized equipment. By mastering the 2-zone setup, precise temperature control, and proper smoke management, you can confidently smoke a variety of meats.
Remember to prioritize food safety by monitoring internal temperatures and adhering to the 4-hour rule, ensuring delicious and safe results every time.
Related BBQ Guides

Grill Wind Guards: Your Guide to Consistent Flame Control
Discover our top-rated grill wind guards for 2026. We tested the best for durability, heat resistance, and easy setup. Find the perfect fit for your BBQ.

Top Folding Grill Tables for Camping to Upgrade Your Cookout
Discover the best folding grill tables for camping to elevate your outdoor cooking setup. Compare top portable options and find your perfect match today.

Easy Chicken Salad Recipe: Ready in Minutes
Make the best chicken salad at home with our foolproof recipe. Rotisserie shortcuts, creamy dressing tips & easy variations ready in minutes.