

You’ve got the grill, the meat, and a bag of charcoal sitting on the patio – but the coals just won’t cooperate. Learning how to start a charcoal grill is the one skill that separates a frustrating cookout from a great one. This guide covers every method, every mistake, and every variable so you get a clean, even fire every single time.
What You Need to Get Started
Before you touch a single briquette, get these items together:
- Chimney starter – the fastest, cleanest way to light charcoal (strongly recommended)
- Long-handled tongs – for arranging hot coals safely
- Heat-resistant grilling gloves – essential when pouring lit coals
- Lighter or matches – a long-reach lighter is safest
- Newspaper or fire starter cubes – fuel for the chimney or pyramid method
- Grill thermometer – optional but highly recommended for temperature control
Before lighting anything, clean out old ash from the bottom of the grill. Ash blocks airflow – and airflow is what keeps charcoal burning. Open all bottom vents fully before you start.
- Hotec stainless steel kitchen tongs — handling and turning food easily
- ThermoMaven bristle-free grill brush — safely clean grill grates without loose wires
- Temppro TP19H waterproof digital meat thermometer — verifies meat doneness without guesswork
Lump Charcoal vs. Charcoal Briquettes
The charcoal you choose affects your fire, your flavor, and how easy the whole process is. Here’s how the two main types stack up:
| Feature | Lump Charcoal | Briquettes |
|---|---|---|
| Burn Temperature | Hotter (up to 700°F+) | Moderate (500-600°F) |
| Burn Time | Shorter (burns fast) | Longer (burns steady) |
| Flavor | Pure wood smoke flavor | Neutral, consistent |
| Consistency | Variable piece sizes | Uniform size and shape |
| Cost | Higher | Lower |
| Best For | Searing, hot and fast | Beginners, long cooks |
For beginners, briquettes are the better choice. They’re predictable, easy to stack, and they maintain even heat without constant attention. Once you’re comfortable managing a fire, experiment with lump charcoal for steaks and high-heat cooks.
How Much Charcoal to Use
Using the right amount of charcoal is the difference between a grill that runs at 400°F and one that barely hits 250°F.
| Cook Type | Small Grill | Full-Size Kettle (22″) |
|---|---|---|
| Burgers / Hot Dogs (medium heat) | ~25 briquettes | 50-60 briquettes |
| Steaks / Chops (high heat) | ~30 briquettes | 65-75 briquettes |
| Chicken / Indirect Cook | ~20 briquettes | 40-50 briquettes |
| Long Cook / Low and Slow | Varies – refill needed | Start with 50, add every 30 min |
On cold or windy days, add 10-15 extra briquettes. Wind pulls heat away from the grill faster than most people expect.
How to Start a Charcoal Grill Step by Step
Here’s the complete process from cold grill to cooking-ready fire:
- Clean the grill and open all vents – remove old ash, open bottom and top vents fully
- Measure your charcoal – use the table above as your guide
- Load the chimney or arrange the coals – chimney starter is Method 1 below; pile method for lighter fluid
- Light the charcoal – choose your method (chimney, lighter fluid, or fire starter cubes)
- Wait for the coals to ash over – 15-20 minutes; coals are ready when at least two-thirds are covered in white ash
- Pour and arrange the coals – even spread for direct heat, or pile on one side for two-zone cooking
- Replace the cooking grate and preheat – close the lid for 5 minutes with vents open
- Cook, then shut down safely – close all vents to starve the fire when done
Method 1 – Chimney Starter (Recommended)
A chimney starter is the single best tool you can own for charcoal grilling. It lights coals fast, requires no lighter fluid, and produces zero chemical taste in your food.
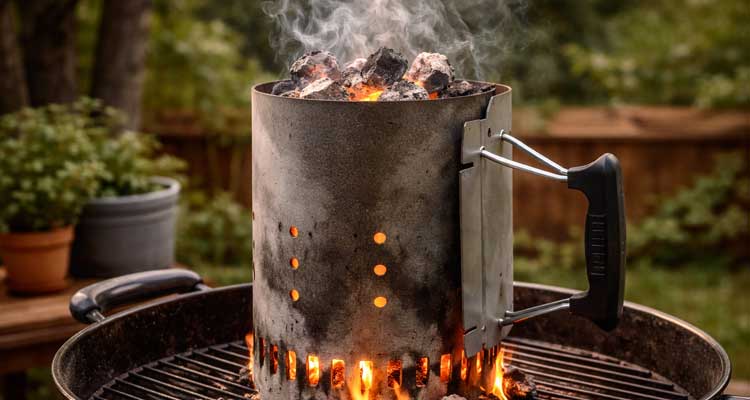
Here’s how to use one:
- Remove the cooking grate and place the chimney starter directly on the charcoal grate inside the grill bowl
- Stuff 2-3 sheets of crumpled newspaper (or one fire starter cube) into the bottom chamber
- Fill the top chamber with the measured amount of charcoal
- Use a long-reach lighter to ignite the newspaper from the bottom openings
- Leave the chimney in place – don’t touch it – for 10-15 minutes
- The coals are ready when the ones on top show white ash and you can see orange glow at the bottom
- Put on your heat-resistant gloves, grip the handle, and carefully pour the coals into the grill
The coals are ready when at least two-thirds of the surface is covered in white or grey ash and smoke has died down significantly. Cooking over still-black, smoky coals gives food a harsh, bitter taste. Patience here pays off. Once coals are poured, arrange them for your cook. For two-zone cooking – the most versatile setup – pile all coals on one half of the grill and leave the other side empty. This gives you a hot direct-heat zone and a cooler indirect zone. Learn the full technique in our two-zone grilling guide.
Method 2 – Lighter Fluid
Lighter fluid is a faster setup but requires more care. Done right, it leaves no flavor trace. Done wrong, your food tastes like petroleum.
- Arrange charcoal in a pyramid shape at the center of the charcoal grate
- Squirt lighter fluid evenly over the top and sides of the pile – about a 10-second application is enough for a standard load
- Wait 30 seconds for the fluid to soak in slightly, but no longer – evaporated fluid won’t catch well
- Light with a long-reach lighter from the side of the pyramid, not the top
- Step back and let the fire establish for 2-3 minutes, then let it die down
- Wait for full ash coverage (15-20 minutes) before cooking
Critical safety rules: Never add lighter fluid to coals that are already lit or still warm – this causes dangerous flare-ups. Keep the fluid bottle well away from the grill at all times.
Method 3 – Fire Starter Cubes
Natural cubes made from compressed wood shavings and wax provide a clean, chemical-free alternative to lighter fluid and work with or without a chimney:
- Position one or two cubes: Place them under a chimney starter in place of newspaper, or tuck them into the base of a charcoal pyramid.
- Light the cubes: Ignite them with a match or long-reach lighter. They light reliably even in windy conditions and do not create off-flavors.
- Let them burn: Leave the cubes undisturbed for 8–12 minutes so they can ignite a full load of charcoal.
Wait until at least two-thirds of the charcoal is ash-covered before cooking, just as you would with the chimney or lighter-fluid method.
How to Control Temperature on a Charcoal Grill
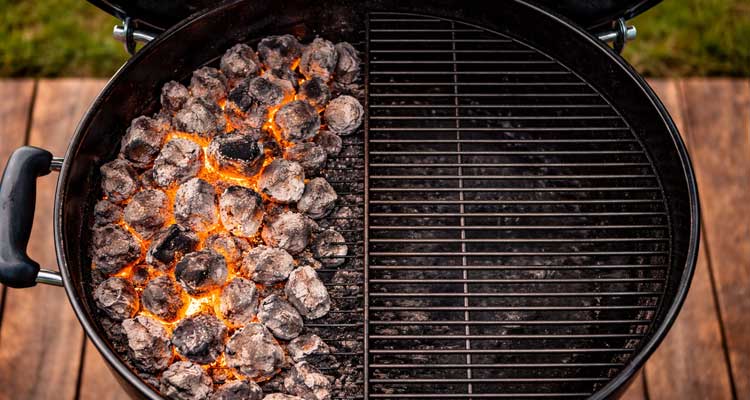
Temperature control on a charcoal grill comes down to two things: coal arrangement and vent management. Vents:
- Bottom vent (intake damper) – controls how much oxygen feeds the fire. Fully open = maximum heat. Partially closed = lower temperature. Fully closed = fire goes out.
- Top vent (exhaust damper) – controls smoke and heat escape. Keep it partially open during most cooks; closing it traps heat and can snuff the fire over time.
A useful starting point: open both vents fully when lighting. Once coals are ready and food is on, dial back the bottom vent to 50% for medium heat (around 350-400°F). Close it to 25% for low and slow (225-275°F). Two-zone setup: Place all coals on one side for direct high heat, and use the empty side for indirect cooking. This lets you sear over the coals, then move food to the cooler side to finish cooking through without burning. It’s the most versatile arrangement for any cook. See our full breakdown in the two-zone grilling guide. Adding coals during long cooks: For cooks over 45 minutes, add 5-10 unlit briquettes every 30 minutes to keep the fire steady. Place them around the edges of the hot coals so they can ignite gradually without spiking the temperature.
Common Charcoal Grill Starting Mistakes
These are the errors that trip up most beginners – and they’re all avoidable:
- Cooking before coals are ready – if the charcoal is still black and smoking heavily, wait. Grey ash = even heat. Black coals = unpredictable, bitter flavor.
- Not cleaning the ash first – old ash at the bottom blocks the intake vents. No airflow, no fire. Takes 30 seconds to dump – always do it.
- Overdoing the lighter fluid – more fluid doesn’t mean faster lighting. It means chemical vapor sitting in the grill, ready to flare up or flavor your food.
- Skipping the lid preheat – after pouring the coals, put the lid on for 5 minutes with vents open. The cooking grate comes up to temperature, and food won’t stick.
- Not using a thermometer – guessing grill temperature is the fastest way to ruin a good piece of meat. A clip-on grill thermometer costs very little and removes the guesswork entirely.
- Forgetting the two-zone setup – placing food directly over coals with no escape zone leads to flare-ups and charring. Set up two zones, even for simple cooks.
Once you’ve got your fire dialed in, putting it to work on a great steak is the obvious next step. Our guide on how to grill steak walks through searing temperatures, flip timing, and doneness without cutting.
Frequently Asked Questions
How long should charcoal burn before cooking?
Do you open or close vents when starting charcoal?
How do I know when charcoal is ready to cook on?
Can I start a charcoal grill without lighter fluid?
How much lighter fluid should I use?
Why won’t my charcoal stay lit?
Can I add more charcoal while cooking?
How do I shut down a charcoal grill safely?
Is lump charcoal better than briquettes for beginners?
What temperature should a charcoal grill be for burgers?
Is match-light (instant-light) charcoal safe to use?
Yes, match-light charcoal is pre-treated with a lighting fluid so it ignites with a single match, no chimney or lighter fluid needed. It’s genuinely convenient for beginners, but let it burn fully to ash-covered (the same 15-20 minutes as regular charcoal) before cooking, since the treatment chemicals need to burn off completely — don’t rush straight to cooking once it catches flame.
Are electric or propane charcoal starters better than a chimney starter?
Electric coil starters and propane torch lighters are hands-off alternatives that skip newspaper or lighter cubes entirely — you just hold the heating element against the charcoal for a few minutes until it catches. They work well and avoid an open flame during lighting, but require access to a power outlet (electric) or a separate fuel canister (propane), while a chimney starter needs nothing but the charcoal itself.
Get the Fire Right First
Consistent charcoal starts come down to four fundamentals:
- Begin with a clean grill: Remove old ash so the intake vents can supply oxygen.
- Measure the right amount of charcoal: Match the fuel load to the grill size, heat level, and cook length.
- Wait for ash coverage: Give the coals time to establish even heat before food goes on.
- Manage the vents: Use airflow to raise, lower, or extinguish the fire safely.
A chimney starter makes each of these steps easier. Practice the process through a few cookouts and it will quickly become second nature.
Related BBQ Guides

Perfect BBQ Refreshment: Top Patio Coolers for Outdoor Entertaining
Discover the top 5 patio coolers for 2025. Keep drinks cold and enhance your outdoor space with our expert picks for the best outdoor beverage coolers.

Smoked Pork Ribs: The Ultimate Recipe for Tender, Flavorful Ribs
Explore our favorite recipes of pork ribs for the smoker, oven, and grill, with prep tips, wrap methods, and doneness tests for tender results.
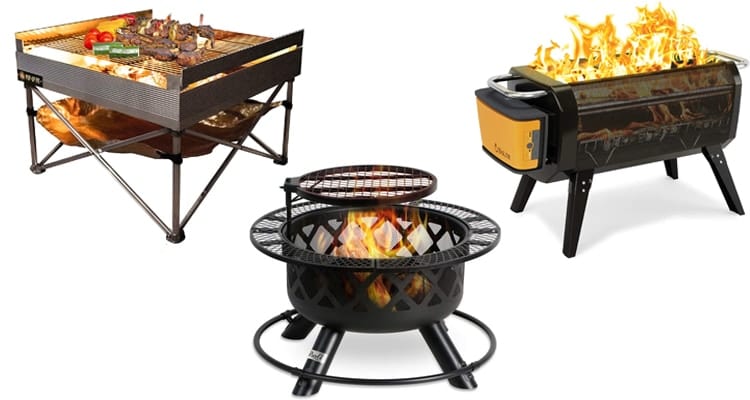
Fire Pit Grills: Dual-Purpose Cooking and Ambiance for 2026
Discover the 7 best fire pit grills of 2026 for your outdoor kitchen. Our expert reviews cover smokeless, portable, and propane options for perfect backyard cooking.