
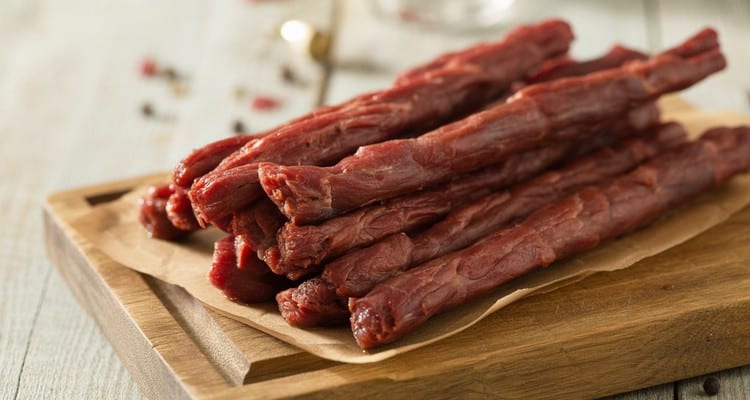
Making your own smoked beef sticks at home is one of the most rewarding smoker projects you can take on. You control every ingredient — the meat quality, the seasoning blend, the smoke flavor — and you end up with a shelf-stable snack that blows commercial versions out of the water.
This guide covers the full process: choosing the right meat and fat ratio, mixing until tacky, stuffing collagen casings, smoking gradually, and finishing with an ice bath and bloom. The method works on pellet grills, electric smokers, and offsets.
- Ingredient Control: Craft your own smoked beef sticks with complete control over meat quality, seasoning, and smoke flavor, creating a superior, shelf-stable snack.
- Key Takeaway: Step-by-Step Process – Follow a comprehensive guide covering meat selection, mixing, stuffing, a precise step-up smoking schedule, and finishing techniques for perfect texture and safety.
- Safety First: Utilize curing salt and a calibrated thermometer to ensure food safety, reaching an internal temperature of 160°F to prevent bacterial growth during low-temperature smoking.
- Flavor Customization: Experiment with various flavor profiles like jalapeño cheddar or teriyaki, maintaining core ratios while swapping seasonings for endless delicious variations.
Why Make Your Own Smoked Beef Sticks?
Homemade smoked beef sticks give you full control over ingredients, flavor, and quality. You can dial in the fat ratio, skip the fillers and preservatives found in commercial snack sticks, and experiment with flavor profiles that simply don’t exist in a store. The batch size also makes the time investment worthwhile — one smoking session can produce dozens of sticks.
What Ingredients and Equipment Do You Need?
Build the recipe around five ingredient groups and three essential tools:
- Lean ground beef with the correct fat ratio for a firm, nongreasy stick.
- Curing salt measured precisely for the batch weight.
- A binder, seasoning blend, and cold water for flavor and texture.
- Edible collagen casings sized for snack sticks, unless using the casing-free option.
- A sausage stuffer, calibrated thermometer, and low-temperature smoker for consistent filling and controlled cooking.
Measure every ingredient before mixing so the curing salt and seasoning are distributed through the full batch.
Choosing the Right Smoker or Grill
Choose a cooker by its ability to hold the low temperatures in the step-up schedule:
- Pellet grill: A digital controller can maintain temperatures as low as 150°F, making models such as Traeger Pro or Ironwood practical for this process.
- Electric smoker: Set-it-and-forget-it controls suit snack sticks. On a cabinet model such as a Masterbuilt, keep the top exhaust fully open and add chips or sawdust in small increments to maintain thin blue smoke and prevent condensation from softening the casings.
- Offset smoker or kettle grill: Either can work, but both require more active fire management during the early low-temperature stages.
Do not use a flat-top griddle or other high-heat cooker. The goal is slow drying and smoking, not searing.
Choosing the Right Meat and Fat Ratio
Select the meat blend with rendered fat and final texture in mind:
- All-beef baseline: Use 85/15 or 90/10 ground beef for enough richness without excessive fat loss.
- Avoid high-fat blends: Extra fat can render into the casing, create a greasy texture, cause splits, and shorten refrigerated shelf life.
- Venison variation: A 50/50 venison-to-beef mix provides a lean, smoky profile.
- Fat adjustment: If a game-meat blend is too lean, add a small amount of pork fat to reach the intended ratio.
Keep the chosen meat cold from grinding through stuffing so the fat stays distinct instead of smearing.
The Critical Role of Curing Salt
Curing salt — most commonly Prague Powder #1 (also called Instacure #1 or pink curing salt) — is not optional for smoked beef sticks. The low-temperature smoking process holds meat in the food safety danger zone (40°F-140°F) for several hours. Curing salt prevents the growth of Clostridium botulinum, the bacteria that causes botulism, during that extended window.
Use exactly the amount specified in your recipe — typically around 1 teaspoon per 5 pounds of meat. Never substitute table salt, sea salt, or Himalayan salt for curing salt. They look similar but provide zero protection.
Pink curing salt is dyed pink specifically so it won’t be confused with regular salt.

Adding Tang: Encapsulated Citric Acid and Fermento
To replicate the signature tangy, shelf-stable flavor found in commercial snack sticks, you can use additives like encapsulated citric acid or Fermento. Fermento is a dairy-based starter culture that mimics traditional fermentation, adding a mild, old-world tang. Alternatively, encapsulated citric acid provides an immediate sour kick; however, it must be folded into the meat mixture gently at the very end of mixing—just before stuffing—to prevent the acid barrier from breaking down prematurely and ruining the meat’s texture.
- ThermoMaven wireless meat thermometer — tracks long cooks remotely without opening smoker door
- Traeger Signature Blend pellets — delivering balanced smoke for backyard cooking
- Western BBQ smoking wood chips variety pack — provides wood-smoke flavor for charcoal or gas grills
How Do You Make Smoked Beef Sticks Step-by-Step?
The process has four main stages before the sticks ever touch the smoker: seasoning the meat, mixing until tacky, stuffing the casings, and an overnight cure in the refrigerator. Each stage builds on the last, and skipping one — especially the overnight cure — will compromise both food safety and finished texture.
Step 1: Prepare and Season the Meat Mixture
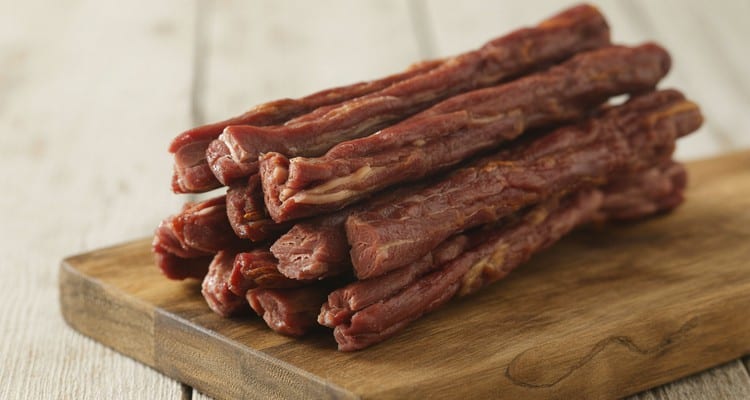
Prepare the mixture without allowing the meat to warm:
- Whisk the curing salt, binder, and spice blend together in a small bowl so the cure cannot concentrate in one area.
- Add the dry mixture and cold water to the ground beef in a large bowl or stand mixer.
- Monitor meat temperature throughout preparation.
- Pause and refrigerate for 20–30 minutes if the mixture begins to warm.
Cold meat protects the texture by preventing fat smear before protein extraction begins.
Step 2: Mix Until Tacky (The Protein Extraction Phase)
Work the cold mixture until its proteins create a cohesive bind:
- Mix on low with a paddle attachment for 5–10 minutes, or knead by hand for the same duration.
- Watch for a sticky, fibrous texture rather than a loose ground-meat consistency.
- Perform a squeeze test: A handful should cling to itself instead of falling apart.
Proper extraction produces the dense, chewy bite of a beef stick; under-mixing leaves the cooked filling crumbly.
Step 3: Stuffing the Casings
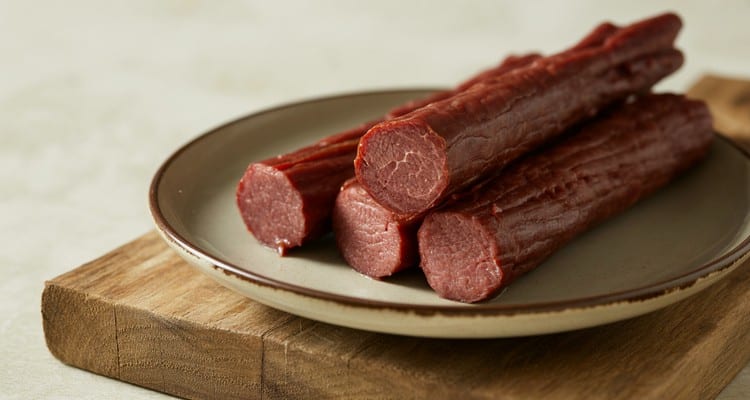
Fill the collagen casings evenly without straining them:
- Load the cold mixture into a sausage stuffer or jerky gun.
- Slide the casing onto the nozzle and feed meat with slow, steady pressure.
- Guide the casing as it fills so it is firm but not stretched tight enough to tear.
- Release trapped air with a toothpick or cake tester before the filling firms.
- Twist or tie 6–8 inch sections for standard snack-stick portions.
For a casing-free version, pipe 3/8- or 1/2-inch ropes directly onto wire racks or mesh mats. Thorough protein extraction is especially important because no casing supports the shape; use the same step-up smoking schedule.
Step 4: The Overnight Cure
The overnight rest completes two jobs before smoking:
- Arrange the stuffed sticks in one layer on wire racks over sheet pans.
- Refrigerate uncovered for at least 12 hours so the cure can distribute through the meat.
- Check the casing surface before smoking; it should feel dry to slightly tacky, not wet.
The cure time supports food safety, while the dry casing develops stronger smoke adhesion and a deeper finished color.
What Is the Proper Temperature and Timing for Smoking?
Smoked beef sticks are cooked using a series of carefully controlled temperature steps. This step-up schedule starts low to finish drying the casings and absorbing smoke, then gradually increases heat to safely cook the meat through. This gradual approach prevents fat from rendering out too quickly, which causes greasy sticks and burst casings.
The total smoke time is typically 4-6 hours depending on your smoker and ambient conditions. Many pellet grills, including the Traeger lineup, make this series of temperature changes easy to manage with their digital controls.
The Step-Up Smoker Temperature Schedule
Set your smoker to the starting temperature before loading the sticks. Add your wood choice once the smoker is up to temperature — you want smoke flowing from the start of the first stage. Here is the complete step-up schedule:
| Stage | Duration | Smoker Temp | Purpose |
|---|---|---|---|
| Stage 1 | 1-2 hours | 130-140°F | Final casing dry-out and initial smoke absorption |
| Stage 2 | 1-2 hours | 150-160°F | Begin cooking through and deepen smoke color |
| Stage 3 | 1-2 hours | 170-180°F | Finish cooking to safe internal temperature |
Advance through the stages gradually and use their durations as guides; the batch is finished only when multiple sticks reach the target internal temperature.
Reaching the Target Internal Temperature
Confirm doneness with measurements rather than appearance:
- Target: Every tested beef stick must reach 160°F[USDA].
- Sampling: Check several sticks from different areas because grate temperature can vary.
- Tool: Use a calibrated instant-read thermometer.
- Visual caution: Cured meat stays pink after cooking, so color alone cannot confirm safety.
Elapsed time is only an estimate; internal temperature is the finish line.
The Water Poaching Finishing Method
An alternative, fool-proof method used by many professional sausage makers to finish beef sticks is water poaching. Once the sticks have absorbed smoke for 2 to 3 hours and reached an internal temperature of around 135°F to 140°F, transfer them directly into a pot of hot water maintained at 165°F. Poach the sticks until they hit their target internal temperature of 160°F. This rapid, even heat transfer prevents the fat from rendering out while ensuring the sticks reach a safe temperature quickly. Immediately transfer them to the ice bath afterward.
How Do You Finish and Store Your Beef Sticks?
The finishing steps happen immediately after the sticks come off the smoker. An ice bath stops the cooking, and a room-temperature bloom develops the color and tightens the casings. Skipping either step doesn’t ruin the batch, but nailing both gives you a noticeably better finished product — firmer casings, deeper color, and a cleaner bite.
The Ice Bath and Blooming Process
Finish the sticks immediately after they leave the smoker:
- Submerge in ice water for 5–10 minutes to stop cooking and tighten the collagen casings around the filling.
- Remove and pat completely dry.
- Hang or rack at room temperature for 1–2 hours to bloom.
- Watch the color deepen from grayish-pink to a dark mahogany red.
The ice bath creates a cleaner snap, while blooming develops the final casing color and surface texture.
Storing in the Refrigerator
Once fully bloomed, transfer the beef sticks to an airtight container or zip-top bag and refrigerate. Properly cured and smoked sticks will keep in the refrigerator for up to 2-3 weeks. The salt and cure extend shelf life significantly compared to uncured meat.
Freezing for Long-Term Storage
For longer storage, vacuum seal individual portions and freeze for up to 6 months. Vacuum sealing prevents freezer burn and preserves the smoke flavor far better than standard zip-top bags. Thaw in the refrigerator overnight — they will taste nearly identical to the day they came off the smoker.
What Are the Best Flavor Variations for Beef Sticks?
Once you master the basic technique, you can experiment with a wide range of flavor profiles. The key is to maintain the core ratios of meat, cure, and binder while swapping out the seasonings and add-ins. Here are a couple of popular variations to get you started.
Jalapeño Cheddar Beef Sticks
For a classic spicy and cheesy stick, add finely diced pickled jalapeños and high-temp cheddar cheese to your meat mixture. Use about 1 cup of cheese and 1/2 cup of diced jalapeños per 5 pounds of meat. It is critical to use high-temp cheese, which is designed not to melt out during the smoking process.
To achieve the perfect texture, always use high-temperature cheddar cheese (which has a melting point of 400°F) cut into 1/4-inch cubes. For the jalapeños, if using fresh peppers, seed and finely dice them, then sauté or dehydrate them slightly before adding. This removes excess moisture that would otherwise create wet, mushy pockets inside the meat mixture during the smoking process.
Teriyaki and Black Pepper
For a sweet and savory flavor, replace half of the cold water in the recipe with low-sodium soy sauce or teriyaki sauce. Add 1-2 tablespoons of brown sugar and a generous amount of coarse black pepper to the spice blend. A pinch of ginger powder can also enhance the teriyaki profile.
Honey BBQ and Sweet Profiles
For a sweet and savory alternative, a Honey BBQ profile is highly popular. To achieve this, mix 2 to 3 tablespoons of powdered honey or maple sugar into your dry seasoning blend per 5 pounds of meat. Avoid using liquid honey or syrup in large quantities, as the excess moisture can interfere with protein extraction and casing drying. Pair the sweetness with a high-quality BBQ rub and a touch of smoked paprika for a balanced, backyard-style snack stick.
How Do You Troubleshoot Common Beef Stick Problems?
Even experienced cooks run into issues the first couple of batches. Most beef stick problems trace back to one of three sources: meat temperature during mixing, smoker temperature management, or protein extraction during the mix phase. Here is how to diagnose and fix the most common issues.
Why Are My Beef Sticks Greasy?
Greasy sticks are almost always caused by smoking temperature that spiked too high, causing the fat to render and pool inside the casing. Stick to the step-up schedule and avoid rushing to the final temperature stage.
Why Are My Beef Sticks Crumbly?
Crumbly sticks point to under-mixing — if the protein extraction phase was cut short, the meat won’t bind and will fall apart when bitten.
Why Did My Casings Burst During Smoking?
Burst casings are usually caused by two things: overstuffing or a smoker temperature that is too high. Stuff the casings firmly but not so tight that they are strained. Follow the step-up temperature schedule carefully to prevent fat from rendering too quickly, which creates pressure inside the casing.
Why Do My Beef Sticks Have Poor Smoke Color?
A pale, uneven color is typically due to wet casings. The overnight cure in the refrigerator is essential for drying the casing surface. A dry, slightly tacky casing allows smoke to adhere properly, resulting in a deep, uniform mahogany color.
Take Home Message
Making your own smoked beef sticks is a rewarding process that offers complete control over ingredients and flavor. By following a precise step-by-step guide, including proper curing, mixing, stuffing, and a gradual step-up smoking schedule, you can achieve delicious, safe, and perfectly textured snack sticks.
Remember to prioritize food safety with curing salt and ensure the internal temperature reaches 160°F for a successful batch.
Frequently Asked Questions
Do you have to use curing salt for smoked beef sticks?
Yes — curing salt is required for safety when smoking beef sticks using a low-temperature step-up schedule. The extended time in the danger zone (40°F-140°F)[USDA] creates conditions where Clostridium botulinum can multiply rapidly without a cure present. Prague Powder #1 at the correct dosage provides the necessary protection.
Do not substitute regular salt or skip this ingredient.
What temperature do beef sticks need to reach?
Smoked beef sticks must reach an internal temperature of 160°F[USDA] to be considered safe for consumption. This applies to any ground beef product. Use a calibrated instant-read thermometer and check multiple sticks from different positions in the smoker to confirm even cooking throughout the batch.
How long should you smoke beef sticks?
The total smoking time for beef sticks is typically between 4 and 6 hours. This duration depends on your specific smoker, the thickness of the sticks, and ambient weather conditions. Always rely on a calibrated internal thermometer to confirm doneness, aiming for 160°F.
Can you make beef sticks in a smoker?
Absolutely. A smoker is the ideal piece of equipment for making beef sticks. The key is using a smoker or pellet grill that can maintain very low temperatures, starting around 130-140°F, which is crucial for the step-up cooking process.
Does smoke stick better on wet meat or dry meat?
Smoke adheres significantly better to a dry or slightly tacky surface. This is why the overnight curing step in the refrigerator is so important. It allows the casings to dry out, creating the perfect surface to absorb smoke for a deep, rich color and flavor.
What are common jerky mistakes to avoid?
Beef sticks and jerky are both smoked snacks, but they fail in different ways. Jerky suffers when the meat is too fatty, while beef sticks usually fail from under-mixing or poor temperature control.
How long do homemade beef sticks last?
Properly cured and smoked beef sticks will keep in the refrigerator for 2-3 weeks in an airtight container. Vacuum-sealed and frozen sticks keep for up to 6 months with minimal quality loss. Always refrigerate homemade sticks — unlike many commercial products, homemade versions are not shelf-stable at room temperature without further drying and water activity reduction.
Can I use a jerky gun instead of a sausage stuffer?
Yes, a jerky gun works well for smaller batches of beef sticks. It functions similarly to a sausage stuffer but is hand-operated like a caulk gun. Ensure you have a round nozzle attachment designed for snack sticks.
Can you smoke beef sticks at 225 degrees?
Smoking beef sticks at 225°F is generally too high and not recommended. At this temperature, the fat inside the meat will render out too quickly, leaving you with dry, shriveled, and greasy sticks. It is best to stick to a gradual step-up schedule starting at 130-140°F and topping out at 170-180°F.
Do you need to flip beef sticks while smoking?
No, you do not need to flip beef sticks while smoking, especially if they are hanging or laid out on wire cooling racks. The convective airflow inside a smoker ensures even heat distribution and smoke penetration on all sides of the casings without manual turning.
Homemade Smoked Beef Sticks
Equipment
- Smoker Pellet grill, electric, or offset capable of holding 130-180°F
- Kitchen scale For accurate measurement of meat and curing salt
- Stand mixer with paddle attachment Or a large bowl for hand-mixing
- Sausage stuffer or jerky gun For filling casings
- 19-21mm collagen casings Standard snack-stick size
- Digital instant-read meat thermometer
- Wire cooling racks and sheet pans
- Large bowl or container For the ice bath
Ingredients
For the Beef Sticks
- 5 lbs lean ground beef 85/15 or 90/10
- 1 tsp Prague Powder #1 Also called Instacure #1 or pink curing salt. Do not omit.
- 3 tbsp non-fat dry milk powder Acts as a binder
- 3 tbsp Kosher salt
- 2 tbsp coarse black pepper
- 2 tbsp smoked paprika
- 1 tbsp garlic powder
- 1 tbsp onion powder
- 1 tsp mustard powder
- 1/4 cup cold water
- 19-21mm collagen casings As needed
Instructions
- In a small bowl, whisk together all dry ingredients: Prague Powder #1, non-fat dry milk powder, kosher salt, black pepper, smoked paprika, garlic powder, onion powder, and mustard powder. This ensures the curing salt is evenly distributed.
- Place the cold ground beef in the bowl of a stand mixer or a large mixing bowl. Add the blended dry seasonings and the cold water.
- Using the paddle attachment on low speed (or mixing vigorously by hand), mix the meat for 5-10 minutes. The mixture is ready when it becomes very sticky and fibrous. This protein extraction is key to the final texture.
- Load the meat mixture into your sausage stuffer or jerky gun. Slide a collagen casing onto the nozzle and stuff the mixture into the casings, avoiding air pockets. Do not overstuff. Twist into links of your desired length (6-8 inches is typical).
- Arrange the stuffed beef sticks in a single layer on wire racks set over sheet pans. Place them uncovered in the refrigerator to cure for at least 12 hours, or overnight. This step is crucial for the cure to work and for the casings to dry, which helps smoke adhere.
- Preheat your smoker to 130°F. Hang the beef sticks from smoker racks or lay them on wire mesh shelves, ensuring they don't touch.
- Smoke for 1 hour at 130°F. Then, increase the smoker temperature to 140°F and smoke for another hour.
- Increase the temperature to 150°F and continue to smoke for 2 hours.
- Finally, increase the temperature to 175°F and smoke until the internal temperature of the beef sticks reaches 155°F, as measured with an instant-read thermometer. This can take 1-2 more hours.
- Immediately transfer the finished beef sticks to a large ice bath to stop the cooking process and help set the casings. Chill for about 10-15 minutes.
- Remove the sticks from the ice bath, pat them dry with paper towels, and hang them at room temperature for 1-2 hours to 'bloom'. This step develops their final color and firms up the texture.
- Cut the sticks to your desired length. Store in a vacuum-sealed bag in the refrigerator for several weeks or freeze for longer storage.
Notes
Related BBQ Guides
Transform Healthy Cooking: Grilled Chicken Quesadillas with Vibrant Veggies
Make restaurant-quality grilled chicken & veggie quesadillas at home! Fresh grilled vegetables, seasoned chicken, and melty cheese. Healthy and delicious BBQ recipe.
Master Grill Maintenance: Top Brushes for Perfect Cooking Surfaces
Find the best grill brush for your BBQ needs. We tested top models to bring you the safest and most effective options for clean grill grates in 2026.
Steak Marinade Mastery: Get Tender, Flavorful Results
Master how to marinate steak with our step-by-step guide. Covers timing, best ingredients, cuts, and techniques for maximum flavor and tenderness.