
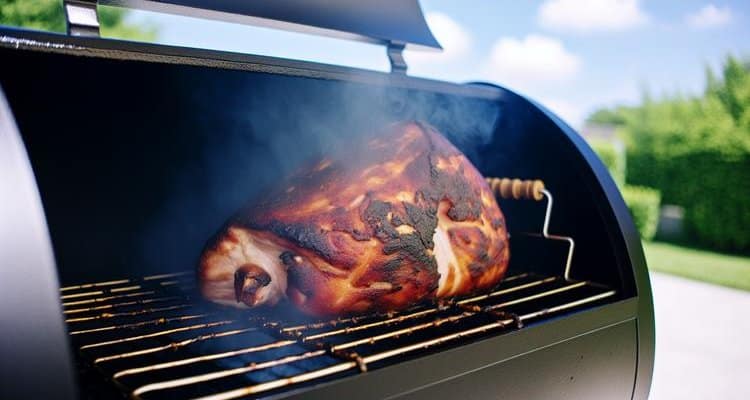
Fat side up or fat side down? It is one of the most debated questions in backyard BBQ, and the answer matters more than most people realize. Getting the orientation wrong can mean the difference between a pork butt with deep, crispy bark and one with a patchy, washed-out surface.
This guide settles the debate based on smoker type, bark formation science, and what actually happens when fat renders over a 10-12 hour cook. The short answer for most setups is fat side down, but the reasoning is what will make your next cook significantly better.
- Fat Side Down is Best — For most smokers, especially pellet grills and offsets, smoking pork butt fat side down protects the meat from direct heat and allows for superior bark formation on the exposed top surface.
- “Self-Basting” is a Myth — The popular theory that fat side up self-bastes the meat is largely incorrect; rendered fat mostly runs off and can wash away your rub, hindering bark development.
- Smoker Type Matters — Always orient the fat cap towards the primary heat source. Since most smokers have a bottom-up heat source, fat side down is the optimal choice for heat protection and bark.
- Hybrid Method for Bark & Moisture — Consider starting fat side down for bark, then flipping to fat side up when wrapping at the stall (160-170°F) to braise the meat within the wrap.
The Verdict: Should You Smoke Pork Butt Fat Side Up or Down?
For most smokers, place the pork butt fat side down. Make the final decision by matching the fat cap to the cooker’s heat path:
- Pellet grills, offset smokers, ugly drum smokers, and most kamados: Put the fat side down so the cap shields the meat from heat below.
- Bark-focused cooks: Keep the seasoned top exposed to dry, smoky air so the rub can form a dark, even crust.
- Top-down heat: Use fat side up only when the cooker sends its strongest radiant heat from above.
- Wrapped finishing: You may flip the butt fat side up after wrapping the pork butt, once the bark is set.
The fat cap is most useful as a heat shield. Rendered surface fat largely runs off rather than basting the interior, and placing it on top can wash seasoning from the bark.
Why Is the Pork Butt Fat Cap Important?
The fat cap is the thick layer of subcutaneous fat covering one side of the pork butt. Trim it to about ¼ inch before smoking so it can protect the meat without blocking smoke and rub.
What is the Pork Butt Fat Cap?
Use these visual cues to distinguish the exterior cap from internal marbling:
- Fat cap: A solid, smooth layer of white or creamy-white fat covering one flat side of the roast. It may begin ½ inch to more than 1 inch thick.
- Marbling: Small flecks of white intramuscular fat running through reddish-pink muscle.
- Other seams: Thin bands of fat and silver skin separating visible muscle groups.
Marbling melts within the muscle and supports internal moisture. The exterior cap renders slowly, but it is too thick to penetrate deeply; its main jobs are shielding the surface and contributing flavor.
How to Identify the Fat Cap Side
Look for the broad, uniform white layer rather than scattered white flecks. The opposite sides will show more exposed muscle, seams, and distinct muscle groups.
How to Trim the Fat Cap for Smoking
Keep the pork butt cold and use a sharp, flexible boning knife. The trim should take about 5–10 minutes:
- Shave down the thickest areas first while holding the blade nearly parallel to the surface.
- Work toward an even ¼-inch layer across the entire cap.
- Remove hard, waxy fat and silver skin because they will not render during the cook.
- Stop before exposing broad patches of muscle.
A uniform ¼-inch cap is thick enough to shield the meat but thin enough to render without leaving a greasy layer.
A few tools support the trim, temperature checks, and optional wrap:
Optional: Scoring the Fat Cap
After trimming, you may score the remaining fat with a shallow diamond or crosshatch pattern. The cuts increase surface area, encourage even rendering, and allow some rub to reach deeper without cutting into the meat.

What Is the Case for Smoking Pork Butt Fat Side Up?
The argument for fat side up is that rendering fat will flow over the roast and keep it moist. In practice, three factors limit that benefit:
- Fat and water do not mix: Dense, water-rich muscle absorbs little exterior oil.
- Most rendered fat runs off: The moisture in pulled pork comes mainly from internal collagen turning into gelatin.
- Runoff can damage bark: Flowing fat acts like a solvent and carries spice rub away, producing a patchy crust.
Fat side up can still make sense when heat comes primarily from above or when the roast is already wrapped, but it is not an effective way to baste the interior.
A thin binder of yellow mustard, olive oil, or hot sauce can improve rub adhesion, but it cannot fully resist hours of rendering grease. Use a binder for an even seasoning layer, not as a substitute for orienting the fat cap correctly.
- ThermoMaven professional digital meat thermometer — check internal temperature for wrapping at the stall
- Victorinox Fibrox curved boning knife — trim the fat cap cleanly without wasting meat
- Bryco Goods pink butcher paper roll — wrap the pork butt at the stall while preserving bark texture
What Is the Case for Smoking Pork Butt Fat Side Down?
Fat side down provides two practical advantages during a 10–12-hour cook at 225–250°F:
- Heat protection: In cookers heated from below, the cap absorbs and deflects the strongest heat before it reaches the meat, reducing dry or tough spots.
- Better bark: The seasoned “money side” remains exposed to dry, smoky airflow so the Maillard reaction and spice polymerization can form a dark crust.
The result is more even cooking and a larger area of intact, concentrated bark.
Preventing the Fat Cap from Sticking to the Grates
Clean the grates and coat them lightly with a high-smoke-point oil before adding the pork. When moving the roast, slide a wide, sturdy metal spatula beneath the cap instead of pulling on the meat; this releases caramelized fat without tearing the surface.
How Does Your Smoker Type Affect Fat Cap Orientation?
Point the fat cap toward the strongest heat source. Apply that rule by cooker type:
- Pellet smokers and offsets: Use fat side down. Their fire pot or firebox sends heat beneath the grate, while convection helps dry the exposed top for better bark.
- Kamado and vertical smokers with a deflector or water pan: Fat side down is still preferred, although the diffused heat makes shielding less critical.
- Kamados or kettles without a heat deflector: If intense dome radiation is scorching the top, fat side up can protect the meat from that top-down heat.
Brand matters less than airflow and radiant heat. Identify where the harshest heat reaches the roast, then place the cap between that heat and the muscle.
Should You Flip Your Pork Butt During the Cook?
The hybrid method changes orientation only when the pork butt is wrapped:
- Build bark fat side down during the first 4–6 hours of the unwrapped cook.
- Wait for the stall, typically 160–170°F, and confirm the bark is dark, firm, and no longer smudges when touched.
- Wrap in foil or butcher paper, then flip the roast fat side up so rendered fat joins the contained braising liquid.
- Leave the unwrapped roast alone. Flipping before the bark is protected risks tearing the crust.
This approach keeps the bark-building advantage of fat side down while allowing the cap to render inside the wrap during the finish.
How Do You Cook a Perfect Smoked Pork Butt?
This step-by-step recipe applies the fat-side-down principles for a perfect result on any smoker with bottom-up heat. We’ll guide you through trimming, seasoning, smoking to the stall, wrapping, and the crucial resting phase for tender, shreddable pulled pork. Plan for a total time of 10-14 hours from prep to pulling.
Step 1: Preparation and Seasoning
Start with a cold 8-10 lb bone-in pork butt and trim the fat cap to a uniform 1/4-inch thickness. Apply a thin layer of a binder like yellow mustard or olive oil. Coat all sides generously with your favorite pork rub.
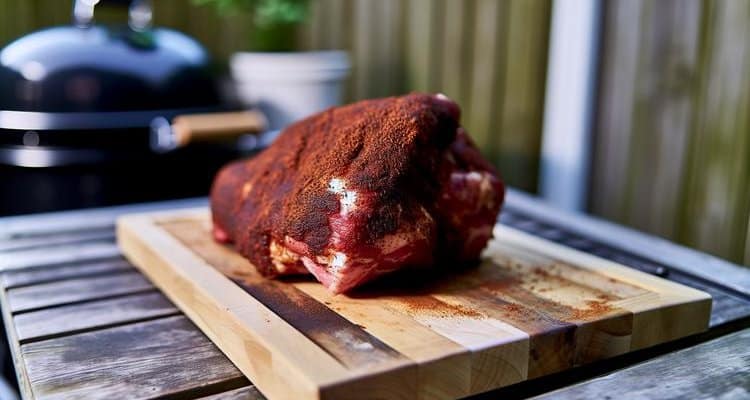
Let the seasoned butt sit for 15-30 minutes while your smoker comes to temperature, which can take another 15-25 minutes.
Step 2: Smoking and Bark Formation
Preheat your smoker to 225-250°F using a mild wood like apple, cherry, or hickory. Place the pork butt directly on the grate, fat side down. Let it smoke undisturbed for the first 3-4 hours.
This allows the bark to begin setting properly without interruption. Check your smoker temperature every 45-60 minutes to ensure it remains stable.
Step 3: The Stall and The Wrap
After about 5-7 hours, the internal temperature will likely stall around 165°F due to evaporative cooling. This phase can last anywhere from 2 to 6 hours. Once the bark is a deep mahogany color and firm to the touch, it’s time to wrap.
You can use aluminum foil for a faster cook and softer bark, or use butcher paper to better preserve the bark’s texture.
Using the ‘Fat Cap Split’ as a Visual Cue
In addition to monitoring internal temperatures, you can use the physical appearance of the fat cap as a visual indicator for when the pork butt is ready to wrap. As the fat renders and the meat contracts, the fat cap will naturally begin to split and pull apart, forming deep cracks that expose the dark meat underneath. When you see this distinct ‘fat cap split’ combined with a firmly set, dark mahogany bark, it is a clear sign that the fat has rendered sufficiently and the pork is ready to be wrapped.
Step 4: Finishing the Cook
Place the wrapped pork butt back in the smoker. Continue cooking until the internal temperature reaches 195-205°F. While this higher temperature is for tenderness, always confirm the pork has reached a food-safe minimum of 145°F[USDA] during the cook.
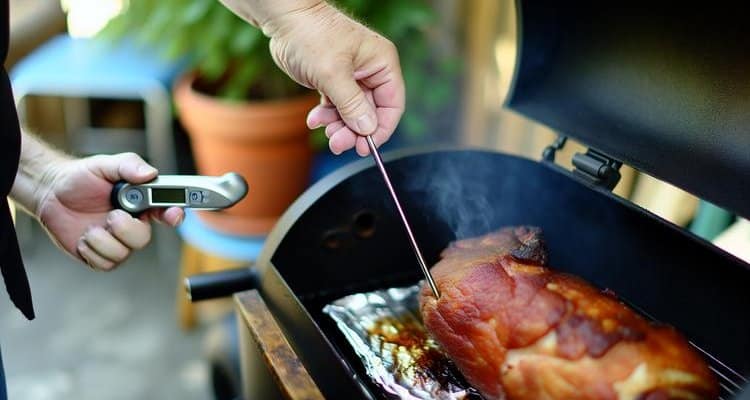
The most important indicator of doneness is probe tenderness. A thermometer probe should slide into the thickest part of the meat with almost no resistance, like going into warm butter. This final stage can take another 2 to 4 hours.
Step 5: The Crucial Rest
This step is non-negotiable. Remove the pork butt from the smoker and let it rest, still wrapped, in a dry cooler or an oven that is turned off. Rest for at least one hour, and ideally 2-4 hours.
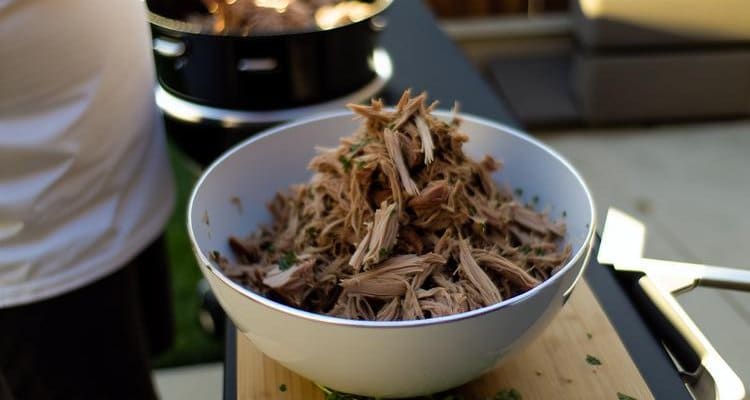
This allows the muscle fibers to relax and reabsorb juices, resulting in a much moister final product. The pork will stay safely hot in a cooler for up to 4 hours.
Smoked Pork Butt Timeline and Temperature Chart
| Stage | Smoker Temp | Target Internal Temp | Estimated Time | Notes |
|---|---|---|---|---|
| Smoking (unwrapped) | 225-250°F | 165°F (the stall) | 5-7 hours | Place fat side down. Do not spritz for the first 3-4 hours to allow bark to set. |
| Smoking (wrapped) | 225-250°F | 195-205°F (probe tender) | 2-4 hours | Wrap in foil or butcher paper. Optional: flip to fat side up inside the wrap. |
| Resting | N/A (in cooler) | Allow temp to drop to 150-160°F | 1-4 hours | Keep wrapped in a dry cooler or turned-off oven. Do not skip this step. |
Use the timeline as a planning guide, but let bark quality, internal temperature, and probe tenderness determine when each stage is complete.
What Is the Best Wood for Smoking Pork Butt?
Mild to medium woods work best for pork butt. Apple, cherry, and pecan offer a subtle sweetness that complements the pork without overpowering it, while hickory and oak provide a more classic, robust smoke flavor. Avoid strong woods like mesquite, which can be too intense for a long cook.
How Long Should You Rest a Pork Butt?
Resting is crucial for juicy pulled pork. A minimum of one hour is required, but resting for 2-4 hours is ideal as it allows the muscle fibers to relax and reabsorb moisture. Keep the wrapped pork butt in a dry cooler to maintain a safe holding temperature.
What Is the Ideal Internal Temperature for Pulled Pork?
The target internal temperature for pulled pork is between 195°F and 205°F. While the pork is food-safe at 145°F, it won’t be tender enough to shred until the connective tissues break down into gelatin. This happens at these higher temperatures, so always prioritize probe tenderness over a specific number.
Frequently Asked Questions
When baking a pork roast, do you put the fat side up or down?
When baking a pork roast in an oven, it is generally best to place it fat side up. Since an oven provides indirect, dry heat without a direct flame immediately below the meat, the rendering fat cap can melt over the sides of the roast, helping to keep the surface from drying out. However, if you are roasting at a very high temperature to get a crispy skin or crackling, starting fat side up is essential for direct heat exposure.
When smoking a pork loin, do you put the fat up or down?
When smoking a pork loin, you should place it fat side up. Pork loin is a very lean cut of meat with a thin fat cap and very little internal marbling. Placing the fat side up helps protect the delicate loin meat from drying out under the smoker’s heat, while allowing the rendering fat to coat the exterior of the meat during the relatively short cook time.
Take Home Message
For most smokers, the decision comes down to three rules:
- Face the fat cap toward the primary heat source. With bottom-up heat, that means fat side down.
- Protect the bark-building surface. Keeping the seasoned top exposed prevents rendering fat from washing away the rub.
- Flip only after wrapping, if desired. A hybrid finish at the 160–170°F stall can add rendered fat to the liquid contained by foil or butcher paper.
Use fat side up from the start only when the cooker applies its strongest heat from above.
Printable Smoked Pork Butt Recipe
Smoked Pork Butt Fat Side Down
Equipment
- Smoker Pellet grill, offset, or kamado style
- Boning Knife For trimming the fat cap
- Instant-read thermometer Essential for monitoring internal temperature
- Foil or Butcher Paper For wrapping the pork butt during the stall
Ingredients
The Pork
- 1 bone-in pork butt (Boston butt) 8-10 lbs
The Rub & Binder
- 2 tbsp yellow mustard as a binder (optional)
- 1/2 cup BBQ pork rub your favorite store-bought or homemade blend
Instructions
- Start with a cold pork butt. Using a sharp boning knife, trim the fat cap down to an even quarter-inch thickness. Optionally, score the fat in a shallow diamond pattern to help it render.
- Apply a thin layer of yellow mustard over the entire surface of the pork butt to act as a binder for the rub. Season generously on all sides with your BBQ pork rub.
- Preheat your smoker to 225-250°F. Place the pork butt directly on the smoker grate with the fat side down.
- Smoke for 4-6 hours, or until a dark, mahogany bark has formed and the internal temperature reaches 160-170°F. This is the unwrapped phase where bark development is critical.
- Once the bark is set, wrap the pork butt tightly in two layers of heavy-duty foil or butcher paper. If using the hybrid method, you can flip it fat side up at this stage.
- Return the wrapped pork butt to the smoker and continue cooking until the internal temperature reaches 203-205°F and a probe slides in with no resistance. This can take another 3-6 hours.
- Remove the pork butt from the smoker and let it rest, still wrapped, in a dry cooler or on a countertop for at least 1 hour. Do not skip this step, as it allows the juices to redistribute.
- After resting, unwrap the pork butt, remove the bone (it should slide out cleanly), and shred the meat using forks or meat claws. Serve immediately.
Notes
Related BBQ Guides

Smoked Corned Beef Rub for a Perfect Pastrami-Style Bark
Master our smoked corned beef rub recipe to create a perfect pastrami-style bark. Learn the essential steps for soaking, smoking, and slicing corned beef.

Hibachi Grills: Authentic Japanese-Style Cooking at Home
Discover the best hibachi grills for 2026, from traditional cast iron models to portable options. Compare features, prices & reviews to find your perfect hibachi

Perfect Parking Lot BBQ: Top Tailgating Grills for Game Day Excellence
Looking for the perfect portable grill for tailgating? We tested the top models to find the best options for your game day cookouts. See our top picks for 2026.