

There’s something magical about transforming ordinary supermarket cheese into sophisticated, smoky gourmet delicacies in your own backyard. Cold smoking cheese combines the art of traditional smoke preservation with modern outdoor cooking techniques, creating complex flavors that simply can’t be purchased at any price. Unlike hot smoking, which cooks food with heat and smoke, cold smoking infuses cheese with wood smoke flavor at temperatures low enough to preserve the cheese’s original texture and consistency.
The benefits of cold smoking cheese extend beyond flavor enhancement. You’ll develop a deeper understanding of temperature control and smoke management—skills that transfer to all aspects of outdoor cooking. Cold smoked cheese makes impressive homemade gifts, elevates everyday meals, and costs a fraction of what artisan smoked cheese commands at specialty stores. Best of all, the process is surprisingly straightforward once you understand the fundamentals.
In this comprehensive guide, you’ll learn everything needed to cold smoke cheese successfully: the science behind cold smoking, essential equipment, cheese selection strategies, wood pairing recommendations, step-by-step instructions, the critical aging period that most beginners overlook, troubleshooting common problems, and safety considerations. Whether you’re new to outdoor cooking or an experienced pit master looking to expand your skills, this guide will help you produce restaurant-quality smoked cheese at home.
What is Cold Smoking?
Cold smoking is a preservation and flavoring technique that exposes food to smoke at temperatures between 68°F and 90°F—well below the temperature at which proteins denature or fats begin to melt. This temperature range allows smoke compounds to penetrate the food’s surface and infuse flavor without altering texture, making it ideal for cheese, fish, nuts, and cured meats.
The fundamental difference between cold smoking and hot smoking lies in heat management. Hot smoking combines cooking and flavoring in one process, typically operating between 225°F and 275°F. Cold smoking separates these functions entirely, focusing exclusively on flavor development while maintaining the food’s original state.
| Characteristic | Cold Smoking | Hot Smoking |
|---|---|---|
| Temperature Range | 68-90°F (ideal: 40-60°F) | 225-275°F |
| Primary Purpose | Flavor infusion only | Cooking + flavoring |
| Texture Change | None (preserves original) | Significant (cooks food) |
| Duration | 1-8 hours for cheese | 1-12+ hours (cooks fully) |
| Best Used For | Cheese, fish, nuts, salt | Brisket, ribs, pork shoulder |
| Equipment | Smoke generator separate from heat | Integrated heat and smoke |
The science behind cold smoking cheese involves smoke compounds—primarily phenols, carbonyls, and organic acids—bonding with the protein and fat molecules on the cheese surface. As smoke particles settle, they form a thin, slightly dried layer called a pellicle. This pellicle acts as a foundation for deeper smoke penetration during the aging period, which is why freshly smoked cheese tastes harsh but mellows beautifully after two weeks of refrigeration.
Cheese is particularly well-suited for cold smoking because its high fat content readily absorbs smoke flavor, its firm structure withstands extended smoking times without deterioration, and its mild base flavor provides an ideal canvas for wood smoke complexity. The key is maintaining temperatures low enough that the cheese never sweats, melts, or develops an oily surface—signs that you’ve crossed into hot smoking territory.
- ThermoMaven wireless meat thermometer — monitor pit temperature without opening the lid
- Traeger Signature Blend pellets — mild all-purpose smoke option for cheese
Equipment Needed for Cold Smoking Cheese
A basic cold-smoking setup needs only six components:
- An enclosed smoker or lidded grill to contain and direct the smoke.
- A tube smoker or separate smoke generator that produces smoke without heating the cooking chamber.
- Food-grade wood pellets or chips matched to the cheese.
- A reliable thermometer for continuous chamber-temperature monitoring.
- Wire racks or perforated trays that allow smoke to circulate around each piece.
- Parchment paper and vacuum-sealing supplies for the resting and aging stages.
The smoke generator is the heart of the setup; the comparison below shows the tradeoffs between the two common styles.
The heart of any cold smoking setup is the smoke generator. Two primary options dominate the market, each with distinct advantages:
| Feature | Tube Smoker | Electric Smoke Generator |
|---|---|---|
| Cost | $15-25 | $50-150 |
| Power Source | No electricity needed | Requires 110V outlet |
| Smoke Duration | 3-5 hours per fill | 6+ hours continuous |
| Temperature Control | Minimal heat generation | Adjustable heat output |
| Ease of Use | Simple: fill, light, place | Set temp and time, automatic |
| Best For | Beginners, occasional use | Frequent smoking, precise control |
| Fuel Type | Pellets (easiest) or chips | Chips or bisquettes |
For beginners, a 12-inch perforated tube smoker represents the best starting point. These stainless steel tubes cost under $20, require no electricity, and generate 3-5 hours of consistent smoke—more than enough for cheese. Simply fill the tube with wood pellets, light one end with a torch until pellets catch fire, blow out the flames, and place the smoldering tube in your smoker. The pellets burn slowly from one end to the other, producing clean, cool smoke throughout the process.
A few optional tools make temperature and airflow easier to manage:
- A dual-probe wireless thermometer can track both chamber and cheese-surface temperature.
- A small fan improves smoke circulation in a large chamber.
- Ice pans or frozen water bottles absorb excess heat during warm-weather sessions.
- Silicone mesh mats prevent sticking while preserving airflow beneath the cheese.
These additions are not required for a first batch, but they create a wider safety margin when outdoor conditions are less than ideal.
Set up the equipment with four safeguards:
- Separate smoke from cheese: Place the generator on the lowest rack and keep the cheese at least 12 inches away.
- Maintain ventilation: Leave the dampers partially open so the fuel smolders cleanly.
- Use clean ignition: Never use lighter fluid or petroleum-based starters, which can leave chemical flavors.
- Monitor continuously: Watch chamber temperature for the entire session rather than relying on outdoor temperature alone.
If you prefer built-in controls while learning, quality electric smokers for cold smoking can simplify temperature management.
Best Cheeses for Cold Smoking
Not all cheeses perform equally in cold smoking applications. Success depends on understanding how moisture content, fat percentage, and aging affect smoke absorption and final texture. Hard and semi-hard cheeses with lower moisture content and firmer structure consistently produce the best results, while soft and fresh cheeses present challenges that even experienced smokers struggle to overcome.
| Cheese Type | Examples | Moisture Content | Smoking Success Rate | Smoke Duration | Flavor Profile After Smoking |
|---|---|---|---|---|---|
| Hard | Cheddar, Gouda, Gruyere | Low (30-40%) | Excellent | 2-4 hours | Deep, complex, balanced |
| Semi-Hard | Colby, Monterey Jack, Swiss | Medium (40-50%) | Very Good | 1.5-3 hours | Smooth, mellow, approachable |
| Semi-Soft | Mozzarella, Provolone, Pepper Jack | Medium-High (45-55%) | Moderate (requires care) | 1-2 hours | Subtle smoke, delicate balance |
| Soft | Brie, Camembert, Fresh Mozzarella | High (50-80%) | Poor (not recommended) | N/A | Often becomes acrid, texture suffers |
| Fresh | Ricotta, Cream Cheese, Cottage | Very High (60-80%) | Not Suitable | N/A | Absorbs smoke unevenly, spoilage risk |
The best cheeses for beginners are medium-sharp cheddar, gouda, and colby. These varieties offer firm texture that withstands extended smoking, mild base flavors that complement rather than compete with smoke, readily available prices that make experimentation affordable, and predictable results that build confidence. Sharp cheddar provides enough flavor complexity to balance smoke intensity, while gouda’s slight sweetness creates beautiful caramelized notes that mellow during aging.
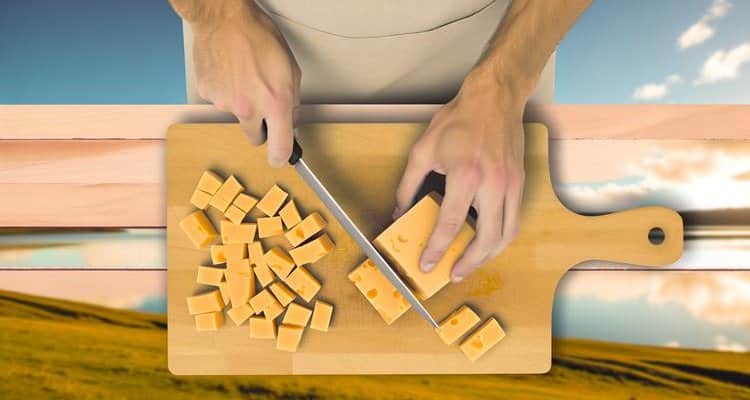
Evaluate a cheese using three factors:
- Moisture: Lower-moisture cheeses—generally under 45%—tolerate temperature fluctuations better and develop a more pronounced smoke flavor.
- Fat: Higher-fat cheeses absorb smoke compounds readily, although they may need a longer aging period for the flavor to balance.
- Base flavor: Pair mild cheese with gentle woods such as apple or cherry; aged cheddar can stand up to a stronger wood such as hickory.
These criteria explain why firm cheddar, gouda, and colby are dependable starting points.
Avoid cheeses that resist even smoke absorption or soften too easily:
- Surface-ripened cheeses such as Brie and Camembert can develop off-flavors when their existing mold cultures meet smoke.
- Ultra-soft cheeses may melt below 80°F.
- Pre-shredded cheese contains anti-caking agents that interfere with pellicle formation.
- Strongly flavored cheese with herbs or spices can clash with the chosen wood.
- Fresh cheese such as ricotta or cream cheese has too much moisture to form a dependable pellicle and presents a greater spoilage risk.
For a first session, stay with an unflavored hard or semi-hard block.
Prepare the selected cheese for even exposure:
- Start with blocks of at least 8 ounces so the cheese does not absorb smoke too aggressively.
- Temper the cheese for 30–60 minutes before smoking to reduce condensation.
- Pat every surface dry immediately before it goes on the rack.
- Cut large blocks into 4–8 ounce portions for more uniform smoke coverage, keeping every dimension at least 2 inches.
Dry, moderately sized pieces build a consistent pellicle without becoming bitter.
Wood Selection and Flavor Profiles
Wood selection dramatically influences the final flavor profile of smoked cheese. Unlike hot smoking where high temperatures can overpower subtle wood differences, cold smoking’s low temperatures allow delicate wood characteristics to shine through. Understanding wood intensity, smoke density, and flavor compatibility helps create balanced results rather than acrid, overly-smoky cheese.
| Wood Type | Flavor Intensity | Flavor Notes | Best Cheese Pairings | Smoking Duration | Beginner-Friendly |
|---|---|---|---|---|---|
| Apple | Mild | Fruity, slightly sweet, clean | Cheddar, Gouda, Swiss, Monterey Jack | 2-4 hours | Excellent |
| Cherry | Mild-Medium | Sweet, fruity, subtle tartness | Gouda, Colby, Pepper Jack | 2-3 hours | Excellent |
| Maple | Mild-Medium | Sweet, smooth, slightly nutty | Cheddar, Swiss, Gruyere | 2-4 hours | Very Good |
| Pecan | Medium | Rich, nutty, slightly sweet | Sharp Cheddar, Gouda, Aged Swiss | 1.5-3 hours | Good |
| Oak | Medium | Bold, traditional smoke, balanced | Aged Cheddar, Gruyere, Provolone | 1.5-2.5 hours | Moderate |
| Hickory | Strong | Bacon-like, bold, assertive | Sharp Cheddar only (use sparingly) | 1-2 hours MAX | Not Recommended |
| Mesquite | Very Strong | Intense, earthy, can be bitter | Not recommended for cheese | N/A | Avoid |
For beginners, apple wood provides the most forgiving learning curve. Its mild, clean smoke profile makes it nearly impossible to over-smoke cheese, even with extended smoking times. The slightly sweet, fruity notes complement virtually every cheese variety without creating bitterness or harsh aftertaste. Apple wood also burns consistently and produces clean white smoke—the hallmark of proper cold smoking technique.
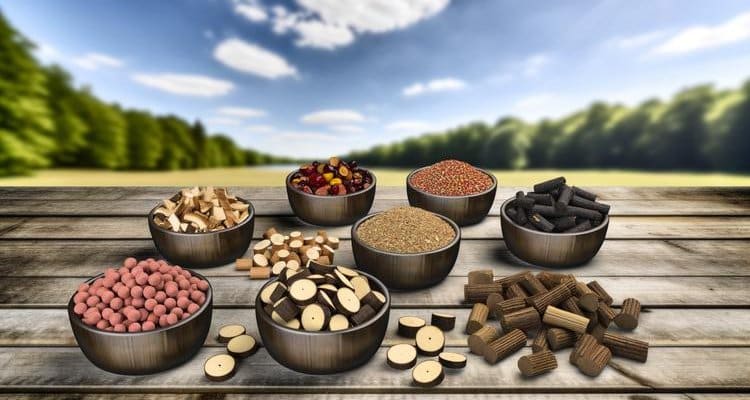
Understanding mild versus strong wood recommendations prevents the single most common beginner mistake: over-smoking with aggressive woods. Woods like hickory and mesquite that excel in hot smoking applications produce overwhelming, acrid flavors in cold smoking because low temperatures allow prolonged exposure without the tempering effect of high heat. What tastes perfect on brisket after 12 hours at 250°F becomes inedibly bitter on cheese after just 2 hours at 70°F. For an in-depth guide on wood characteristics and their applications across different foods, explore comprehensive wood pellet selection resources that detail flavor profiles and pairing strategies.
Pellets versus chips versus chunks represents another critical decision. Wood pellets offer the most consistent results for cheese smoking: they burn evenly with minimal temperature fluctuation, produce clean smoke with complete combustion, work perfectly in tube smokers, and come in numerous flavor varieties at reasonable prices. Wood chips burn faster and hotter, making temperature control more challenging. Wood chunks generate excessive heat for cold smoking applications and are better reserved for hot smoking. For cheese specifically, food-grade pellets designed for smoking (not heating pellets sold for pellet stoves) provide optimal performance.
Advanced flavor combinations involve mixing woods to create complexity. Try 70% apple with 30% cherry for enhanced fruitiness, 60% maple with 40% pecan for nutty sweetness, or 80% apple with 20% oak for subtle depth. Always use milder wood as the base and stronger wood as the accent—never exceed 25% strong wood in any blend when smoking cheese.
Temperature Control and Timing
Temperature control separates successful cold smoking from melted, oily disasters. The ideal temperature range for cold smoking cheese falls between 40°F and 60°F, with an absolute maximum of 90°F. Most hard cheeses begin showing surface sweating around 85°F and develop oily texture above 90°F. Once cheese fat starts melting, the smoking session is ruined—there’s no way to reverse the texture degradation.
| Temperature Range | Result | Cheese Condition | Action Required |
|---|---|---|---|
| 40-60°F | Ideal | Firm, dry surface; no sweating | Continue smoking as planned |
| 61-75°F | Acceptable | Slight surface softening possible | Monitor closely; add ice if rising |
| 76-85°F | Risky | Surface may become tacky | Add ice immediately; improve ventilation |
| 86-90°F | Danger Zone | Sweating begins; fat softening | End session immediately; refrigerate cheese |
| Above 90°F | Failure | Melting; oily texture; session ruined | Discard cheese; wait for cooler weather |
The best weather conditions for cold smoking cheese include ambient temperatures below 60°F, low humidity (under 60% prevents excess moisture), calm winds that won’t extinguish tube smokers, and overcast skies that prevent direct sun heating on the smoker. Fall and winter provide ideal conditions in most climates, while spring and late fall offer acceptable windows. Summer cold smoking requires night sessions, substantial ice management, or air-conditioned garage setups.
Smoking duration varies by cheese type and desired intensity:
| Cheese Type | Light Smoke (Subtle) | Medium Smoke (Balanced) | Heavy Smoke (Intense) | Notes |
|---|---|---|---|---|
| Cheddar (mild-medium) | 1.5-2 hours | 2.5-3 hours | 3.5-4 hours | Most versatile; adjust by preference |
| Cheddar (sharp) | 2-2.5 hours | 3-3.5 hours | 4-5 hours | Strong flavor handles more smoke |
| Gouda | 1.5-2 hours | 2-3 hours | 3-4 hours | Sweet notes complement smoke well |
| Swiss/Gruyere | 2-2.5 hours | 3-3.5 hours | 4 hours | Nutty flavors benefit from smoke depth |
| Monterey Jack/Colby | 1-1.5 hours | 2-2.5 hours | 3 hours MAX | Mild flavor; over-smoking risk |
| Pepper Jack | 1.5-2 hours | 2.5-3 hours | Not recommended | Existing spice; avoid heavy smoke |
Maintaining temperature in different climates requires strategic approaches. In cold weather (below 40°F), no special measures needed—natural ambient temperature keeps cheese cold. In moderate weather (40-60°F), position smoker in shaded area and monitor temperature hourly. In warm weather (above 60°F), place ice pans on lowest rack beneath smoke generator, rotate ice every 60-90 minutes, run smoking sessions at night or early morning, and consider using a small fan to improve circulation and prevent hot spots.
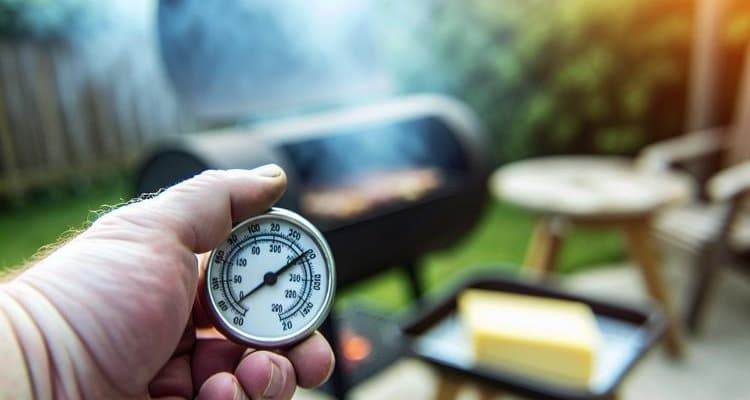
Temperature monitoring tools make the difference between guessing and knowing. Use a dual-probe wireless thermometer with one probe measuring ambient smoker temperature and a second probe attached to a piece of cheese with food-safe tape. This setup provides real-time data on actual cheese surface temperature—the critical measurement that determines success or failure.
Step-by-Step Cold Smoking Process
Follow this comprehensive process for consistently excellent results:
Cheese Preparation (30-60 minutes before smoking)
Prepare the cheese before lighting the smoke source:
- Temper it at room temperature for 30–60 minutes to prevent condensation inside the smoker.
- Cut large blocks into 4–8 ounce portions for easier handling and more even smoke penetration.
- Pat all surfaces completely dry with clean paper towels just before arranging the pieces.
A dry surface accepts smoke evenly instead of developing dark, blotchy patches.
Equipment Setup (15-20 minutes)
Arrange the smoker to balance airflow, distance, and fuel:
- Fill the smoke tube two-thirds to three-quarters full so the pellets have room to breathe.
- Place the tube level on the lowest rack for an even burn.
- Position the cheese at least 12 inches above the tube on wire racks or perforated trays.
- Leave 1–2 inches between pieces so smoke can reach every side.
- Open the dampers one-quarter to one-half to sustain the embers without adding unnecessary heat.
This layout keeps the smoke moving while limiting direct heat exposure.
Lighting and Smoke Generation (5-10 minutes)
Establish clean smoke before adding the cheese:
- Apply a culinary torch or heat gun to one end of the pellets for 2–3 minutes, until an active flame and glowing embers appear.
- Let a cherry-red ember develop, then blow out every visible flame.
- Check smoke quality: Thin white-blue smoke is the goal; thick white smoke signals incomplete combustion.
- Adjust airflow if needed by opening the dampers slightly.
- Wait five minutes to confirm that the tube continues to smolder before placing the cheese inside.
Clean, light smoke builds flavor gradually and avoids an acrid surface.
Monitoring During Smoking (every 30-60 minutes)
Use a regular check cycle throughout the session:
- Temperature: Check every 30 minutes for the first two hours and hourly after that. Add ice immediately if the chamber rises above 75°F.
- Position: Rotate each piece 90 degrees at the halfway point for even smoke exposure.
- Fuel: Confirm that the pellets are still smoldering and relight them if smoke stops.
- Surface condition: End the session immediately if the cheese begins sweating or looks oily.
The planned smoking time is secondary to keeping the cheese cool and dry.
Post-Smoking Cooling (15-30 minutes)
Once the target smoking time is reached:
- Remove the cheese immediately and place it on paper towel-lined trays.
- Cool at room temperature for 15–30 minutes.
- Blot away surface moisture with clean paper towels.
The finished surface should feel dry and may look slightly darker from the deposited smoke.
Wrapping and Initial Storage (24 hours minimum)
Give harsh smoke compounds time to dissipate before sealing:
- Wrap each piece separately in parchment paper so moisture can escape while oxidation remains limited.
- Refrigerate for at least 24 hours before vacuum sealing.
- Vacuum seal only after the initial rest to begin the longer aging period.
Do not seal freshly smoked cheese immediately; the first-day off-gassing is essential to a smoother final flavor.
The Critical Aging Period
The aging period is where good smoked cheese becomes great smoked cheese—yet it’s the step most beginners skip in their eagerness to taste results. Freshly smoked cheese tastes harsh, bitter, and unbalanced because smoke compounds haven’t had time to mellow and integrate with cheese fats and proteins. The science of flavor mellowing involves oxidation of phenolic compounds, fat absorption of aromatic molecules, and moisture equilibration that distributes smoke flavor throughout the cheese rather than concentrating it on the surface.
Proper wrapping technique directly impacts aging success. After the initial 24-hour rest in parchment paper, vacuum seal each piece of cheese individually using high-quality vacuum sealing bags. The vacuum seal serves three critical functions: it prevents moisture loss that would dry the cheese surface, it limits oxygen exposure that causes off-flavors, and it ensures smoke compounds have nowhere to go except deeper into the cheese structure. If you don’t own a vacuum sealer, wrap cheese tightly in plastic wrap, pressing out all air pockets, then overwrap with aluminum foil.
The aging timeline follows these milestones:
- 24 hours minimum: Harsh smoke compounds begin dissipating; cheese is technically edible but still tastes acrid and one-dimensional
- 1 week: Smoke flavor noticeably mellows; bitterness fades; cheese becomes enjoyable but lacks complexity
- 2 weeks recommended: Flavors balance beautifully; cheese achieves restaurant-quality taste; smoke integrates throughout rather than sitting on surface
- 1 month optimal: Peak flavor development; smoke and cheese flavors marry completely; depth and complexity reach maximum potential
- 2-3 months maximum: Beyond this point, smoke flavor begins fading rather than improving; cheese quality may decline
Storage conditions during aging require consistent refrigeration between 34°F and 38°F in the main refrigerator compartment—not the door, where temperature fluctuates. Keep cheese away from strong-smelling foods that might transfer flavors through packaging. Store vacuum-sealed cheese in a dedicated container or zip-top bag for additional protection.
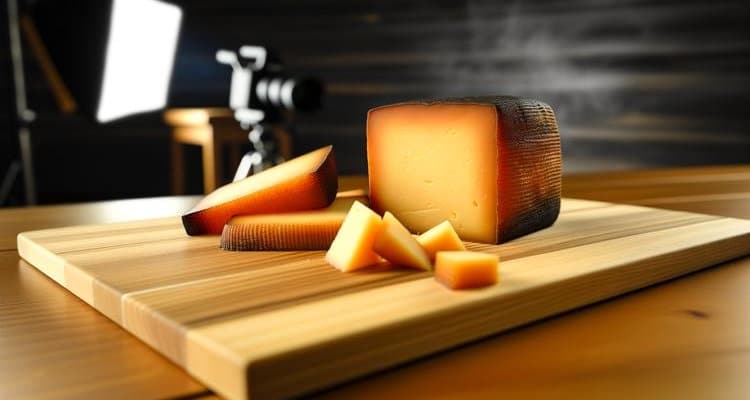
Shelf life for properly aged, vacuum-sealed smoked cheese extends 2-3 months in refrigeration, though quality peaks at 1 month. Once opened, consume within 2 weeks for best flavor and texture. Freezing is possible (up to 6 months) but affects texture—thawed cheese works better for cooking applications than eating fresh. Signs of proper aging include golden-brown surface color, firm but not dry texture, integrated smoke aroma (not overwhelmingly smoky), and balanced flavor without bitterness or acrid notes.
Flavor Variations and Advanced Techniques
Once the basic process is reliable, experiment with one variable at a time:
- Maple glaze: Brush on a thin layer of pure maple syrup before smoking gouda or Swiss for a sweet-savory finish. Avoid artificial syrup, which can introduce chemical flavors.
- Layered woods: Build a three-stage session with one hour of apple, one hour of cherry, and 30 minutes of pecan.
- Double smoking: Smoke cheddar for two hours, age it for two weeks, then smoke it for one more hour and age it for another two weeks. The break allows the first layer to mellow before the second is added.
- Custom blends: Smoke cheeses separately, then grate and combine them. A 60/40 mix of hickory-smoked sharp cheddar and apple-smoked Monterey Jack creates a balanced base for mac and cheese or grilled cheese.
Controlled experiments make it easier to identify which cheese, wood, or timing change improved the result.
Troubleshooting Common Problems
| Problem | Cause | Solution | Prevention |
|---|---|---|---|
| Cheese melted or developed oily surface | Temperature exceeded 90°F | No fix possible; discard and start over | Smoke only when ambient temp below 60°F; monitor temperature continuously; use ice pans in warm weather |
| Too smoky/bitter taste | Over-smoked; too strong wood; thick smoke | Age longer (4-6 weeks) to mellow; blend with unsmoked cheese to dilute | Start with shorter smoking times; use mild woods (apple/cherry); ensure thin, blue smoke |
| Uneven smoke coverage/blotchy appearance | Surface moisture; inadequate spacing; insufficient rotation | Age normally; visual appearance improves during vacuum sealing | Pat cheese dry before smoking; allow 1-2″ spacing; rotate cheese halfway through |
| Excessive condensation during smoking | Cheese too cold when added; high humidity | Wipe condensation immediately; reduce smoking time slightly | Temper cheese to room temp first; smoke on low-humidity days; improve ventilation |
| Off flavors or chemical taste | Petroleum fire starters; treated wood; dirty equipment | No fix; discard cheese | Use only food-grade wood; light with propane torch only; clean smoker between uses |
| Cheese dried out/cracked during aging | Incomplete vacuum seal; aging too long | Grate for cooking use; moisture lost cannot be restored | Ensure proper vacuum seal; consume within 2-3 months |
| Tube smoker won’t stay lit | Insufficient airflow; damp pellets; overfilled tube | Relight; increase damper opening; check pellet dryness | Fill tube only 2/3 full; store pellets in airtight container; ensure adequate ventilation |
Safety and Food Quality Considerations
Cold smoking takes place within the 40–140°F temperature range associated with bacterial growth. Limit risk by using low-moisture hard cheese, keeping sessions to 2–4 hours, and refrigerating the cheese promptly.
Follow these handling and storage controls:
- Sanitize: Wash hands and clean racks, trays, and tools with hot soapy water before use.
- Prevent cross-contamination: Keep cheese tools away from raw meat and avoid touching the cheese with bare hands after smoking begins.
- Age cold: Maintain the refrigerator at 34–38°F, keep packages away from raw meat and strong-smelling foods, and label each one with the cheese type and smoking date.
- Add secondary protection: Store sealed cheese in a clean airtight container or zip-top bag.
Discard the cheese without tasting if you find any of these spoilage signs:
- New white, green, or black mold spots
- A slimy or sticky surface
- An ammonia-like or sour odor distinct from smoke
- Major discoloration beyond a uniform golden-brown smoke tint
Properly aged cheese should smell pleasantly smoky, retain its underlying cheese aroma, feel firm with slight give, and have a consistent surface color. For a full comparison of wireless meat thermometer options, see our wireless meat thermometer guide.
Frequently Asked Questions
How long does cold smoked cheese last?
Properly vacuum-sealed cold smoked cheese lasts 2-3 months in refrigeration, with peak flavor occurring at 2-4 weeks after smoking. Once opened, consume within 2 weeks. Freezing extends shelf life to 6 months but affects texture—thawed cheese works better for cooking than eating fresh. Always label packages with smoking date and check for spoilage signs before consuming aged cheese.
Can I cold smoke soft cheeses like Brie?
Soft cheeses like Brie and Camembert are not recommended for cold smoking by beginners. Their high moisture content (50-80%) prevents proper pellicle formation, their delicate texture cannot withstand smoking without degradation, and their existing surface molds create off-flavors when exposed to smoke. Experienced smokers can cold smoke Brie for very short periods (30-45 minutes maximum) using extremely mild woods, but results remain inconsistent. Stick with hard and semi-hard cheeses for reliable success.
What if I don’t have a smoker?
You can cold smoke cheese using any covered grill (gas, charcoal, or kettle-style) or even a large cardboard box. The key is separating smoke generation from the cheese. For a gas grill, turn off all burners, place tube smoker on grates, and put cheese on opposite side. For charcoal grills, use the tube smoker without lighting any charcoal. A cardboard box cold smoker can be built with $10 in materials: cut ventilation holes at top and bottom, place tube smoker in bottom corner, hang cheese on skewers from top, and monitor temperature carefully. The tube smoker generates smoke without significant heat, making it compatible with virtually any enclosed space.
How do I know when the cheese is done smoking?
Cold smoked cheese is “done” based on your desired intensity level rather than internal temperature or appearance. For mild smoke flavor, remove cheese after 1.5-2 hours. For medium smoke, continue to 2.5-3 hours. For heavy smoke, extend to 3.5-4 hours maximum. The cheese surface should look golden to light brown—darker doesn’t mean better and often indicates over-smoking. Remember that smoke flavor intensifies during aging, so cheese that tastes slightly under-smoked when fresh will taste perfect after 2 weeks in the refrigerator. It’s better to under-smoke and add more later than to over-smoke and ruin an entire batch.
Can I eat the cheese immediately after smoking?
You can technically eat freshly smoked cheese, but it will taste harsh, bitter, and acrid—nothing like the mellow, complex flavor that develops during aging. The aging period is not optional for quality results. At minimum, wait 24 hours after smoking. For good results, age 1 week. For excellent results, age 2 weeks. For optimal complexity, age 1 month. The patience required for aging separates amateur smoked cheese from restaurant-quality products. Think of it like wine—you wouldn’t drink wine immediately after fermentation; you age it to develop proper flavor.
What’s the best wood for beginners?
Apple wood is unquestionably the best choice for beginners learning to cold smoke cheese. Its mild, clean smoke profile makes it virtually impossible to over-smoke cheese, even with extended times. The slightly sweet, fruity notes complement every cheese variety from mild cheddar to sharp gouda. Apple burns consistently and produces the thin, white-blue smoke that indicates proper combustion. Once you’ve successfully smoked several batches with apple and understand the process, branch out to cherry for sweeter notes, maple for complexity, or pecan for nuttiness. Avoid hickory and mesquite until you have substantial experience—their intense flavors overwhelm cheese easily.
How do I prevent my cheese from melting?
Preventing melted cheese requires strict temperature control: smoke only when ambient temperature is below 60°F, use a tube smoker that generates minimal heat, position the tube smoker on the lowest rack far from cheese, monitor temperature continuously with a wireless thermometer, add ice pans if temperature approaches 75°F, and immediately end the session if cheese shows any surface sweating or oily appearance. Winter and fall provide ideal natural temperature control. Summer smoking requires night sessions (after 10 PM when temperatures drop), multiple ice pan rotations, or air-conditioned garage setups. There is no way to salvage cheese that has begun melting—prevention is the only solution.
Can I cold smoke cheese in summer?
Yes, but it requires additional planning and equipment. Summer cold smoking strategies include smoking late at night (10 PM to 2 AM) when temperatures are lowest, using multiple ice pans that are rotated every 60-90 minutes, setting up in an air-conditioned garage with door cracked for ventilation, or using a dedicated cold smoking attachment that generates smoke remotely and pipes it into the smoker. Some enthusiasts use old refrigerators converted to cold smokers with external smoke generators. If ambient temperature exceeds 70°F at night, postpone smoking until fall—the risk of melted cheese outweighs any benefit of summer smoking.
How much does it cost to get started?
The barrier to entry for cold smoking cheese is remarkably low. Essential startup costs include: 12-inch tube smoker ($15-25), food-grade wood pellets ($10 for a bag that will smoke 20+ batches), wireless thermometer ($20-40 for basic dual-probe model), and vacuum sealer with bags ($30-60 for entry-level model). Total investment: $75-135. You’ll also need cheese ($4-8 per pound) and parchment paper ($3). If you already own a grill or smoker of any type, you’re ready to start. This modest investment produces cheese that would cost $18-25 per pound at specialty stores, meaning your startup costs are recovered after smoking just 5-6 pounds of cheese.
Can I freeze cold smoked cheese?
Freezing cold smoked cheese is possible and extends shelf life to 6 months, but it does affect texture. Frozen and thawed cheese becomes slightly crumblier and releases more moisture when melted, making it better suited for cooking applications (mac and cheese, grilled cheese sandwiches, casseroles) than eating fresh. If you plan to freeze smoked cheese, do so after the minimum 2-week aging period while vacuum sealed. Thaw frozen cheese slowly in the refrigerator over 24 hours—never at room temperature. For best quality, avoid freezing and instead smoke smaller batches more frequently to ensure you’re always consuming cheese at peak freshness (2-4 weeks after smoking).
Can I cold smoke cheese with just a smoke tube?
Yes. Fill the tube about 90% full with food-grade hardwood pellets, light one end for 8-10 minutes until it produces steady smoke, then blow out the flame and place it beside the cheese with the grill turned off. It burns independently of the grill’s burners, which keeps the chamber cool enough for cold smoking.
What size should I cut cheese blocks before smoking?
Cut large blocks into bricks roughly 2-3 inches thick. This gives smoke enough surface area to penetrate evenly while keeping pieces large enough that they will not fall through wider smoker grates.
Using a Smoke Tube for Cheese, Plus Prep Tips
A smoke tube is one of the easiest ways to cold smoke cheese without a dedicated cold smoker, since it produces smoke without adding heat from an active fire.
Setting Up a Smoke Tube for Cheese
Fill the tube about 90% full with food-grade hardwood pellets, then light one end with a butane torch or long lighter and let it burn with an open flame for 8-10 minutes. Once you see glowing embers and steady smoke, blow out any remaining flame and set the tube inside your grill or smoker alongside (not under) the cheese – a smoke tube burns independently of your grill’s burners, so it works even with the grill turned off, which keeps chamber temperature low.
Cutting Cheese Into the Right Size
Cut large blocks into smaller bricks, roughly 2-3 inches thick, before smoking. This gives smoke more surface area to penetrate evenly and keeps individual pieces from being too large to smoke through the middle, while still being large enough not to fall through wider smoker grates.
Applying a Seasoning Rub Before Smoking
For extra flavor, you can pat a thin, dry BBQ rub directly onto the cheese’s surface before it goes into the smoker. Use a rub without excess sugar (which can scorch or turn gummy in the smoke) and keep the layer light, since the rub’s flavor will concentrate as the smoke and aging process work on the cheese.
Conclusion
Mastering cold smoked cheese combines understanding fundamental principles with developing practical skills through hands-on experience. The key success factors are straightforward: maintain temperatures between 40°F and 60°F throughout the smoking process, start with beginner-friendly cheeses (medium cheddar, gouda, colby) and mild woods (apple, cherry), monitor temperature continuously rather than guessing, and always age smoked cheese for at least 2 weeks before consuming to allow flavors to mellow and integrate.
For first-timers feeling overwhelmed by the detailed information in this guide, focus on this simplified approach: purchase a tube smoker and apple wood pellets, wait for a day when outside temperature is below 55°F, smoke 1 pound of medium cheddar for 2.5 hours while monitoring temperature every 30 minutes, then vacuum seal and refrigerate for 2 weeks. This single batch will teach you more about the process than any amount of reading, and you’ll produce cheese that rivals anything available commercially.
The next steps involve experimentation and gradual skill development. Try your first batch with cheddar and apple wood following the basic process outlined in this guide. For your second batch, experiment with gouda or swiss to learn how different cheese bases affect final flavor. Third, try a different wood—cherry or maple—to understand how wood selection influences results. Fourth, adjust smoking duration to find your personal preference for smoke intensity. With each batch, you’ll develop intuition for temperature management, smoke quality, and flavor development that transforms cold smoking from following instructions to creative expression.
Cold smoking cheese is uniquely forgiving compared to other smoking disciplines. Unlike brisket where a few degrees too hot ruins expensive meat, cheese costs less per pound and can be sampled at any point during aging. Unlike competition BBQ where decades of practice separate amateurs from experts, cold smoked cheese made by a beginner following proper technique often equals or exceeds commercial products. The combination of low financial risk, short time investment (2-4 hours active smoking), and impressive results makes cold smoking cheese the perfect entry point into the broader world of outdoor cooking and smoke-based flavor development.
If you’re new to outdoor cooking entirely and found the equipment discussions overwhelming, consider reviewing comprehensive beginner resources that explain foundational concepts. The complete BBQ and grilling guide for beginners covers equipment selection, temperature control fundamentals, and safety practices that apply across all outdoor cooking methods. For those ready to explore techniques beyond cold smoking, examining the full range of advanced BBQ cooking techniques reveals how cold smoking fits into the larger context of smoke-based cooking methods, from hot smoking to reverse searing to traditional low-and-slow barbecue.
The journey from reading this guide to producing your first batch of cold smoked cheese can happen this weekend. The only barriers are finding a day below 60°F and investing in basic equipment that will serve you for years. Once you taste cheddar you smoked yourself—complex, balanced, and genuinely impressive—you’ll understand why cold smoking cheese creates such passionate advocates. Welcome to a skill that combines science, craft, and creativity in equal measure. Your first batch awaits.
Related BBQ Guides

BBQ Tongs: Essential Tools for Precise Grilling Control
Looking for reliable BBQ tongs? We tested top grill tongs including heavy-duty & extra-long options to find the most durable grilling tools for your needs.

BBQ Tool Sets: Professional-Grade Essentials for 2026
Looking for the perfect BBQ grill tool set? Our expert guide reviews the top 10 sets for 2026, from professional-grade to budget-friendly options. Find your ideal
Smoker Thermometers: Your Guide to Perfect BBQ Temperature
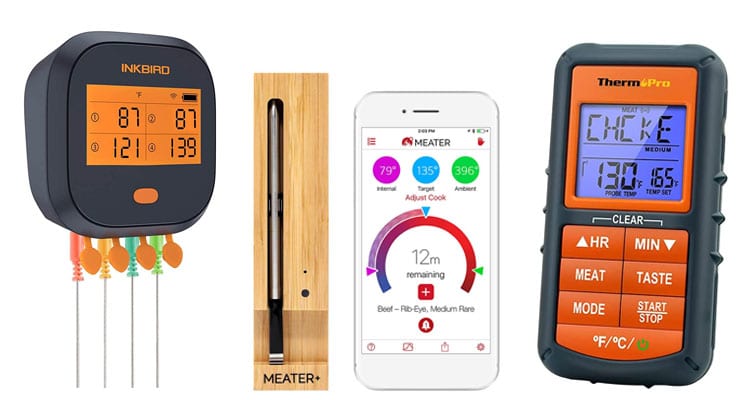
Compare 6 top-rated smoker thermometers with wireless, Bluetooth & multi-probe options. ThermoPro, MEATER & Inkbird tested for accuracy.